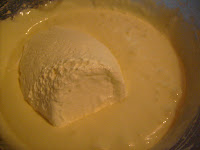
To Make the Filling
1. Leave out 2 blocks of cream cheese to soften. Once they are soft (usually in about an hour), blend them with 3/4 cup of sugar.
2. Beat in 3 eggs one at a time. Add the eggs one at a time and make sure they are well incorporated into the filling so your batter does not become a slimy mess!
3. Beat in 8 oz of sour cream and mix well.
4. Add 8 oz of pumpkin puree, a 1/4 teaspoon of ground cloves, 1 teaspoon of cinnamon, and 1 teaspoon of nutmeg.
5. Blend everything together!
To Make the Crust
1. Pulverize ginger snap or spice cookies until you have two cups worth that are the consistency of sand, and put it in a bowl.
2. Melt 4 tablespoons of butter (either on the stove or in the microwave), and mix it into the crumbs using a fork. It will take a minute before the butter evenly spreads amongst the cookie crumbs.
3. Time to prepare your baking pan! I like using a spring form pan when I make cheesecake, mainly because it is easy to present, and also cut and serve. A spring form pan has a latch on the side of it that allows it to open by approximately an extra half inch around the entire circumference around the pan. I bought mine as a set of 3 from Ross for $9.99, but they can also be found at Bed Bath & Beyond, Walmart, Target, etc. If you do not have a spring form pan, you can use a cake pan. You will need to wrap your pan in aluminum foil. This helps prevent the crust from burning, and also helps the cheesecake cook more evenly!
 |
| Inside spring form pan |
 |
| The buckle - aka business end - of the spring form pan |
4. Spray the inside of your aluminum wrapped pan with Pam or another type of non-stick spray.
5. Pour your cookie crumbs into the pan. (If you are using a shallow cake pan you will only need about half of the crumbs you prepared). Press them into the bottom and sides of the pan to create a layer of crust.
6. Put the pan in the fridge for 15 minutes or longer so the buttered crumbs have time to set and hold the shape of the pan.
To Bake the Cheesecake
1. Pre-heat your oven to 350 degrees.
2. Get your pan out of the fridge and pour the filling into the crust gently. Again, if you are using a shallow pan, you will not need all of the filling. You will only need to fill the pan about half way with the filling.
3. Bake your cheesecake for just over 1 hour. You will need to keep an eye on it...if you open the oven and it has risen and no longer jiggles, your cheesecake is done. Bring it out of the oven and let it cool to room temperature before putting it in the fridge! Don't panic, as it cools it will shrink down to half the height it was when you pulled it out of the oven!
 |
| An example of a cheesecake fresh out of the oven! |
 |
| An example of after the cheesecake cools! |
 |
| The finished pumpkin cheesecake! It cracked a little bit more than the cheesecakes normally do, but it was still delicious! |


No comments:
Post a Comment