My uncle has been gardening like crazy this year, which has essentially created a bumper crop situation in his backyard! Every time we see him, we leave his house with a plethora of heirloom tomatoes, zucchini, eggplant, and an assortment of hot peppers! Being that my dad and I are the only ones in the house that eat any of these items, it has been a little difficult to go through it all. The other night I bit the bullet, bought my sister a bag of chips, and made these fries to go along side our turkey burgers! I will tell you that my mandolin slicer's french fry cutter was a huge help in making these, but is not a necessary piece of equipment to make these. You can cut the veggies into steak fries or strips very easily with a knife!
Zucchini and Eggplant Fries
Yields 5 - 6 servings
Ingredients
1 medium eggplant, cleaned, peeled, and cut into fries
1 medium zucchini, cleaned, peeled, and cut into fries
2 cups of oil, on high heat
4 eggs, beaten
2 cups bread crumbs
Dipping sauce of your choice, I opted for Woeber's Sweet Pepper Sauce
To Prepare the Fries
1. After the veggies are cut, begin heating your oil over high heat. \
2. Dredge a small batch of the veggies through the eggs, and then the bread crumbs.
3. Cook them in the oil until they are golden brown and crisp.
4. Repeat these steps until you have cooked all of the fries.
5. Serve along side a sauce of your choice and enjoy!
Showing posts with label Eggplant. Show all posts
Monday, August 15, 2011
Thursday, October 21, 2010
Eggplant Parmesan
Many of my favorite vegetarian dishes revolve around pasta! I knew when I started the menu for this week, the one dish that my dad would totally be ok with was eggplant parm! He LOVED having this at home, my sister (the veggie hater) on the other hand, was not happy at all. I guess 2 out of 3 isn't bad haha. I liked this recipe because it actually came out with a crispy crust and didn't get soggy. I think eggplant parm tends to go wrong when you feel like you are chewing on rubber...yuck! I will certify this as a rubbery free recipe!
Eggplant Parmesan
Yields 6 servings
To Prepare the Eggplant
1. Peel 1 large eggplant.
2. Cut the Eggplant into 1/2 inch thick rounds.
3. Place the rounds into a sieve and sprinkle some salt on them. This will make the eggplant wilt, which essentially means that we are removing excess moisture, and they are going into a sieve so they are not lying in the juices!
4. After the eggplant has wilted for approximately 30 minutes, take it out the sieve and pat the pieces dry with paper towels.
5. While the eggplant is drying, preheat your oven to 350 degrees.
6. Beat 3 eggs in a bowl, and set aside.
7. Pour 1 cup of bread crumbs onto a plate. I used plain bread crumbs and seasoned them with some dry herbs, but you can definitely use the pre-seasoned!
8. Pour 1/4 inch of olive oil into a frying pan and start heating it on low heat.
9. While the olive oil is heating, dredge approximately 4 slices through the bread crumbs, and THEN coat them in egg.
10. Fry the coated eggplant in the oil, and be sure to flip them once they brown on the first side! When they are brown on both sides, remove them from the oil and place them in a casserole dish. Repeat this process until all of the eggplant is fried and in the casserole dish.
11. Evenly coat the entire casserole of eggplant with pasta sauce (it only should take 1 jar of sauce!). If you want your eggplant to stay SUPER crispy, place it on a baking sheet, spoon a little sauce over the top of each piece, sprinkle with some cheese, and then bake it!
12. Top the sauce with 1/2 to 1 pound of shredded mozzarella, depending on how cheesy you want it! I love cheese, so I used 1 pound!
13. Bake this in the oven for about 15 minutes, or until the cheese is melted and starting to brown.
I served mine over pasta, but it would be good as an eggplant parm sandwich, or along side of some fresh steamed veggies!
Eggplant Parmesan
Yields 6 servings
To Prepare the Eggplant
1. Peel 1 large eggplant.
2. Cut the Eggplant into 1/2 inch thick rounds.
3. Place the rounds into a sieve and sprinkle some salt on them. This will make the eggplant wilt, which essentially means that we are removing excess moisture, and they are going into a sieve so they are not lying in the juices!
4. After the eggplant has wilted for approximately 30 minutes, take it out the sieve and pat the pieces dry with paper towels.
5. While the eggplant is drying, preheat your oven to 350 degrees.
6. Beat 3 eggs in a bowl, and set aside.
7. Pour 1 cup of bread crumbs onto a plate. I used plain bread crumbs and seasoned them with some dry herbs, but you can definitely use the pre-seasoned!
8. Pour 1/4 inch of olive oil into a frying pan and start heating it on low heat.
9. While the olive oil is heating, dredge approximately 4 slices through the bread crumbs, and THEN coat them in egg.
| All set up for dredging! From left to right: Eggplant, bread crumbs, egg, frying pan, casserole dish! |
11. Evenly coat the entire casserole of eggplant with pasta sauce (it only should take 1 jar of sauce!). If you want your eggplant to stay SUPER crispy, place it on a baking sheet, spoon a little sauce over the top of each piece, sprinkle with some cheese, and then bake it!
12. Top the sauce with 1/2 to 1 pound of shredded mozzarella, depending on how cheesy you want it! I love cheese, so I used 1 pound!
13. Bake this in the oven for about 15 minutes, or until the cheese is melted and starting to brown.
I served mine over pasta, but it would be good as an eggplant parm sandwich, or along side of some fresh steamed veggies!
Thursday, September 16, 2010
Ratatouille over Homemade Pasta
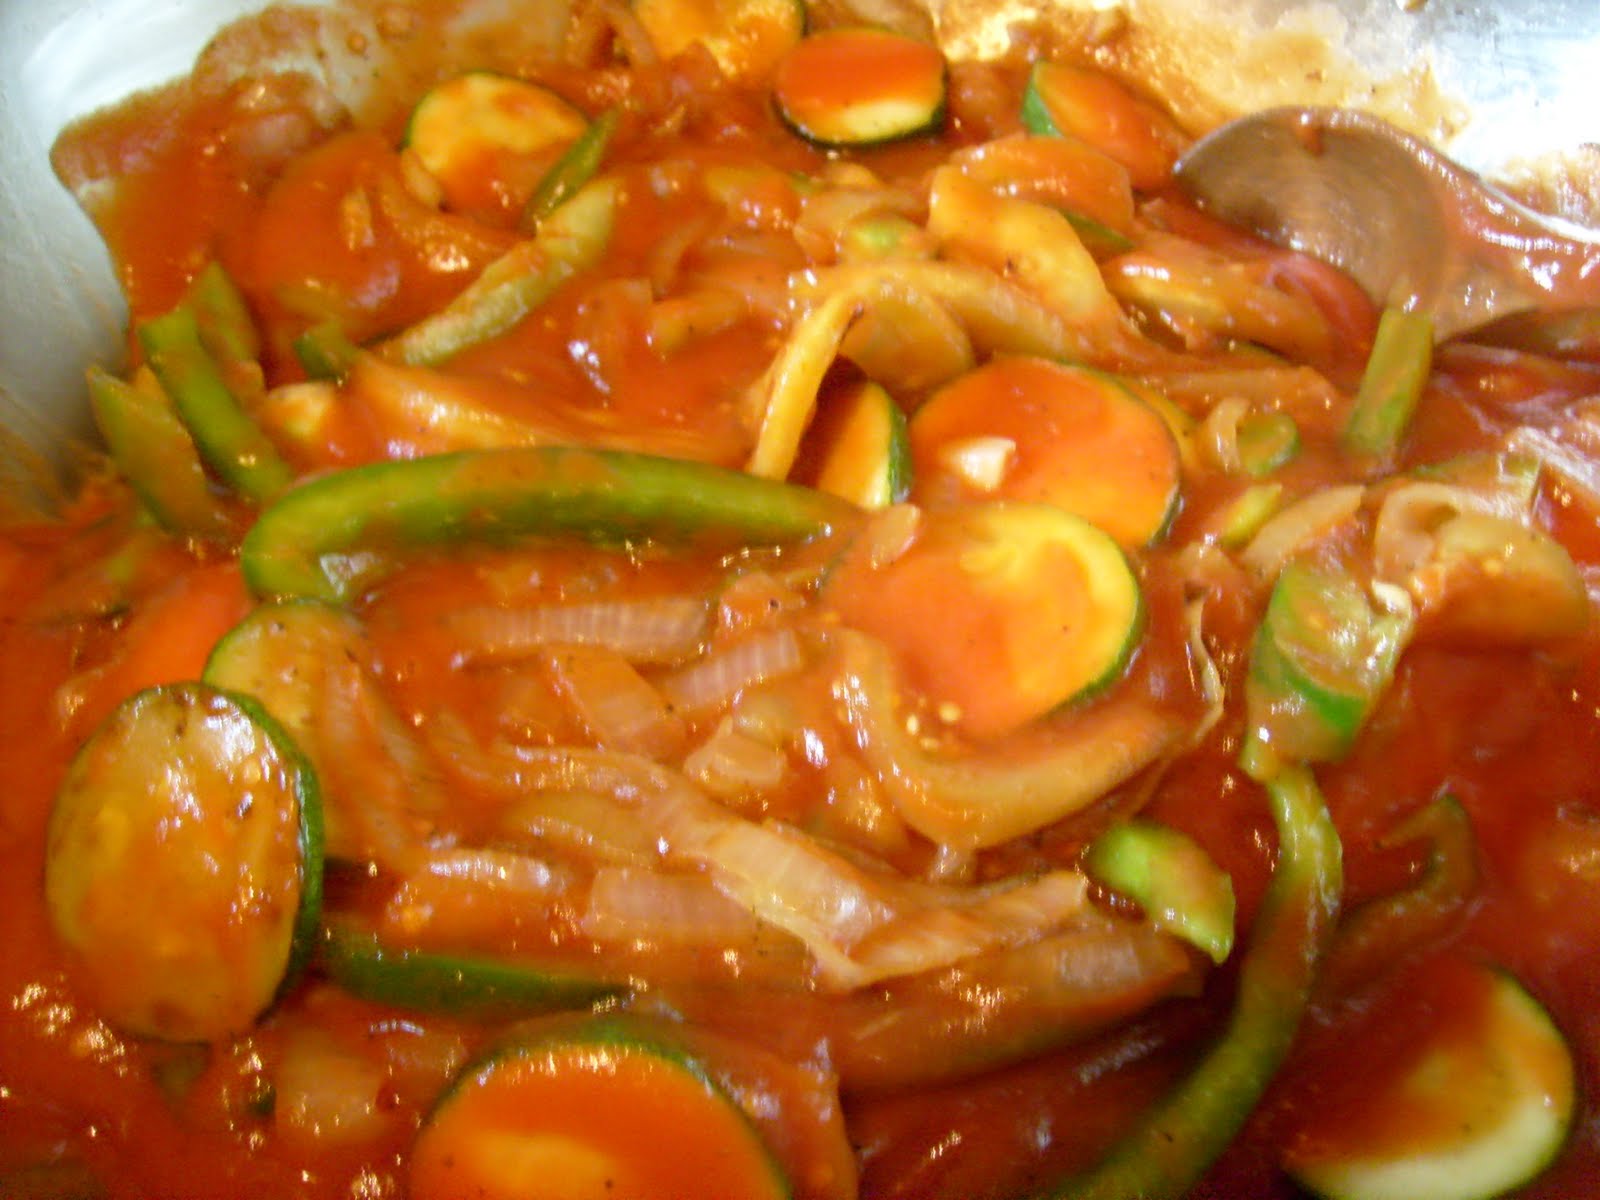
I don't mean the movie! Ratatouille is actually a vegetable stew that finds its roots in Nice,France! The full name of the dish is actually Ratatouille Nicoise (pronounced Knee-Swah). The traditional dish is comprised of eggplant, zucchini, bell pepper, onion, and tomato! Ratatouille is usually served on its own, but it can also be served over rice or pasta, with a side of bread for dipping, in a savory crepe, as a side dish, or even as an omelet filling! Some serving suggestions even say it can be served cold. Ratatouille is sorta like lasagna...it tastes better the next day after all of the flavors meld together...but I usually cannot wait until the next day and have to serve it immediately! It is filling (not loaded with calories), and great on a cold day (and very cheap to make)!
Ratatouille
Yields 5 servings
To Prepare the Ratatouille
1. Peel and large eggplant.
2. Cut the eggplant length wise and then into 1/4 inch thick half moons.
3. Cut a green bell pepper into strips.
4. Cut a zucchini into 1/4 inch thick rounds.
5. Peel an onion, cut it in half length wise, and then cut it into 1/4 inch thick half moons.
6. Heat 4 tablespoons of olive oil in a large pan over medium heat.
7. When the oil is hot, add the onions.
8. Cook the onions until they start to turn translucent and begin to brown around the edges.
9. While the onions are cooking, dice 5 cloves of onion. If you are going to dice them by hand, you will need to take their thick skins off of them. The easiest way to do this is to put a wide blade knife over top of the clove and pressing down on the blade with your fist. Do this carefully so you do not end up with bloody garlic and stitches! When you lift up the knife, the skins of the garlic will have started separating from the cloves, and can be easily peeled off in 1 or 2 pieces by hand. If you are going to use pre-diced garlic (usually found in the produce aisle or with the Italian products at your grocery store), use 2 tablespoons.
10. Once the onions are translucent, add the garlic to the pan, as well as 1 tablespoon of salt, and 1 tablespoon of black pepper.
11. After the above mixture cooks for about 5 minutes, add the zucchini, bell pepper, and zucchini.
12. Cook all of the ingredients down for another 5 minutes.
13. Add 28 ounces of tomato puree and stir well. Cover and cook over medium heat. Be sure to stir it often so it does not burn!
To Prepare the Pasta
*On a side note, if you do not own a pasta maker, you are probably better off going the route of boxed pasta. Unless you have a lot of experience making pasta, not using a pasta maker is a very long, drawn out, and difficult process!
1. Pour 3 cups of flour either onto a very clean surface or a bowl. If you are going to do this on a counter or other surface, you will need to shape the flour into a bowl shape.
2. Mix 3 eggs and 2 tablespoons of olive oil into the flour. You will need to mix it VERY well. Use your hands to mix it...your body heat will help the dough come together. You are going to need to put your whole body and a lot of force into making the dough.
3. Once the dough comes together, form it into a ball, coat it with some olive oil, wrap it in saran wrap, and set it aside for a little bit!
4. After 30 minutes, the dough will be ready!
5. From this point on, follow the suggested preparation directions of your pasta maker!
6. Set a large pot of water to boil. Once the water comes to a rapid boil, add your pasta. I was really thrown off the first time I made pasta because it actually starts to foam for a second when you put it in the water! This is normal...don't panic! The pasta will cook in literally just a minute or two. Serve homemade pasta immediately!
Ratatouille
Yields 5 servings
To Prepare the Ratatouille
1. Peel and large eggplant.
2. Cut the eggplant length wise and then into 1/4 inch thick half moons.
3. Cut a green bell pepper into strips.
4. Cut a zucchini into 1/4 inch thick rounds.
5. Peel an onion, cut it in half length wise, and then cut it into 1/4 inch thick half moons.
6. Heat 4 tablespoons of olive oil in a large pan over medium heat.
7. When the oil is hot, add the onions.
8. Cook the onions until they start to turn translucent and begin to brown around the edges.
9. While the onions are cooking, dice 5 cloves of onion. If you are going to dice them by hand, you will need to take their thick skins off of them. The easiest way to do this is to put a wide blade knife over top of the clove and pressing down on the blade with your fist. Do this carefully so you do not end up with bloody garlic and stitches! When you lift up the knife, the skins of the garlic will have started separating from the cloves, and can be easily peeled off in 1 or 2 pieces by hand. If you are going to use pre-diced garlic (usually found in the produce aisle or with the Italian products at your grocery store), use 2 tablespoons.
10. Once the onions are translucent, add the garlic to the pan, as well as 1 tablespoon of salt, and 1 tablespoon of black pepper.
11. After the above mixture cooks for about 5 minutes, add the zucchini, bell pepper, and zucchini.
12. Cook all of the ingredients down for another 5 minutes.
13. Add 28 ounces of tomato puree and stir well. Cover and cook over medium heat. Be sure to stir it often so it does not burn!
To Prepare the Pasta
*On a side note, if you do not own a pasta maker, you are probably better off going the route of boxed pasta. Unless you have a lot of experience making pasta, not using a pasta maker is a very long, drawn out, and difficult process!
1. Pour 3 cups of flour either onto a very clean surface or a bowl. If you are going to do this on a counter or other surface, you will need to shape the flour into a bowl shape.
2. Mix 3 eggs and 2 tablespoons of olive oil into the flour. You will need to mix it VERY well. Use your hands to mix it...your body heat will help the dough come together. You are going to need to put your whole body and a lot of force into making the dough.
3. Once the dough comes together, form it into a ball, coat it with some olive oil, wrap it in saran wrap, and set it aside for a little bit!
4. After 30 minutes, the dough will be ready!
5. From this point on, follow the suggested preparation directions of your pasta maker!
6. Set a large pot of water to boil. Once the water comes to a rapid boil, add your pasta. I was really thrown off the first time I made pasta because it actually starts to foam for a second when you put it in the water! This is normal...don't panic! The pasta will cook in literally just a minute or two. Serve homemade pasta immediately!
Subscribe to:
Posts (Atom)