Showing posts with label Cheese. Show all posts

Wednesday, August 17, 2011

Grilled Calzones

Cutting Board Wednesday is upon us yet again, and this week I am attacking re-thinking some favorite Italian style fare!  My Italian genes run deep and I just can't let go of my favorite foods, so I have been trying to find new ways to cook and substitute ingredients in some of my favorite dishes to make them a little healthierThanks to the folks in the advertising department at Pizza Hut, I have been craving a P'Zone (aka calzone) like a drunken college kid at 2 am on a 3 day weekend bender.  Thanks to the almighty grill and a filling change I was able to satiate my craving!  I opted for a grilled crust, as opposed to deep fried, chose lean grilled chicken breast, cheddar, and broccoli for my fillings, and decided to nix the sauce.  A light sauce, turkey pepperoni, and skim cheese would work too for the traditionalists out there! Get creative with your fillings and make it to suit your tastes - this recipe's fillings are just a suggestion, so have fun with it!  You can also bake your calzone if you are not the grilling type or the weather just does not want to permit it!


Grilled Calzones 
Yields 3 large calzones

Ingredients 

Crust 
This recipe is the Kitchen Aid Crispy Pizza Crust recipe.  If you do not want to make your own crust, you could use a pre-made plain crust from your local grocery store, or you can buy pre-made pizza dough in a bag, which is usually found near the deli counter at the grocery store!  Pillsbury also has great crusts which can be found near their biscuits and rolls in the refrigerated section of the grocery store! If you decide to use a crust such as Pillsbury, you will need 1 crust for each calzone you intend to make.
1 cup water heated between 110 and 115 degrees Fahrenheit
2 1/4 tsp yeast
1/2 tsp salt
2 tsp olive oil
2 1/2 - 3 1/2 cups flour  

Toppings 
3 boneless, skinless chicken breasts
2 cups shredded cheddar
1 broccoli crown, cleaned and chopped (or 1 small bag of frozen broccoli, thawed)

You will also need aluminum foil for the grill!


To Prepare the Crust
1. Heat the water between 110 and 115 degrees.
2. Pour the yeast and water in a bowl or mixer, and gently mix them together.
3. Add the salt and olive oil to the bowl and gently mix.
4. Add the flour, starting with 2 1/2 cups, and adding no more flour than 3 1/2 cups total.  The dough should stick together in a ball and still be slightly sticky when there is just enough flour added!
5. Coat a bowl with olive oil and place the dough ball in the bowl, turning it until the entire dough ball is coated with a thin layer of oil.
6. Cover the bowl with saran wrap and place it in a warm place that is free of drafts.
7. Let the dough set for an hour, or until it has doubled in size. 

To Prepare the Calzone
1. Prepare your grill by either turning it to a high setting, or getting the coals nice and hot.  If you plan on baking your calzone, pre-heat your oven to 350 degrees. 
2. While your grill is heating, cut three pieces of aluminum foil that are each approximately 1 foot long, and split your dough into 3 equal parts, with each piece of dough going onto a piece of foil.  To keep your calzone from sticking to the foil after cooking, sprinkle some corn meal on the foil!  If you are baking your calzones, you can use a baking sheet with some parchment paper. 
3. Throw your chicken on the grill and cook it until it is almost cooked all of the way through.  Keep in mind that it will be going back on the grill or in the oven, and you will not want it to dry out!  When it is done cooking, cut it into strips or cubes. 
4. Spread the dough into a circle by pressing from the inside of the dough ball out with the palm of your hand.
5. When you are happy with the size and thickness of your crust, fill one half of the circle with fillings, and then gently pull the empty half of the circle over the toppings and press the edge of the calzone shut.
5. Turn down your grill to a low setting, or take the lid off for a few minutes.
6. Carry each of your calzones to the grill by carrying it from opposite corners of the foil, and gently place it down on the grill.
7. Once all of your calzones are on the grill, cover them and let them cook for approximately 10 minutes, or until the bottom of the crust is firm and brown, and the top is firm and cooked through.  The foil will stick just a little bit, so be sure you get all of it off before enjoying your meal!  A little corn meal on the bottom of the crust will greatly help prevent this!  If you are baking them, cook them until the dough is firm and begins to turn golden brown. 

Sunday, July 31, 2011

Grilled Beer and Steak Pizzas

Nothin' like some steak and beer...hot off the grill!

I've been reading about the wonder that is grilled pizza for some time now in magazines and on the internet, and just couldn't wrap my head around the concept and how it would taste.  Today I bit the bullet, and fell in love!

I stewed over several kinds of pizza ideas and was leaning towards a steak direction.  I didn't want to go the route of Philly Cheesesteak - living near Philly I find it is something I can almost get sick of.  I started to think of other foods that are commonly seen paired with steak - potatoes, corn, salad...

Then it hit me - I had Sam Adams Cream Stout sitting in my fridge!  Beer and Steak - there are not many more perfect combinations I can think of!

We DEVOURED these, and could not get enough!  The crusts on these are like nothing I have had before!  Because of the fire on the grill, they get slightly charred and so crispy, yet the top of the crust is chewy.  I see many more of these in my immediate future!

You will need a knife for this pizza - consider yourselves warned! 


Grilled Beer and Steak Pizza
Yields 3 personal sized pizzas

Ingredients 

Crust 
This recipe is an adaptation of the Kitchen Aid Crispy Pizza Crust recipe.  If you do not want to make your own crust, you could use a pre-made plain crust from your local grocery store, or you can buy pre-made pizza dough in a bag, which is usually found near the deli counter at the grocery store! Pillsbury also makes a great rolled dough which is available in the refrigerated area of the grocery store near the biscuits and rolls!
1 cup stout beer heated between 110 and 115 degrees Fahrenheit
2 1/4 tsp yeast
1/2 tsp salt
2 tsp olive oil
2 1/2 - 3 1/2 cups flour  

Toppings 
1/2 pound thinly sliced roast beef, chopped
1/4 pound sliced gouda, chopped
1 small red onion, cut into rings or half moons
1 medium green bell pepper, cut into thin strips
1 medium tomato, diced
2 cups romaine lettuce, chopped

You will also need aluminum foil for the grill!


To Prepare the Crust
1. Heat the beer between 110 and 115 degrees.
2. Pour the yeast and beer in a bowl or mixer, and gently mix them together.
3. Add the salt and olive oil to the bowl and gently mix.
4. Add the flour, starting with 2 1/2 cups, and adding no more flour than 3 1/2 cups total.  Add the flour until the dough sticks together in a ball and is slightly sticky!
5. Coat a bowl with olive oil and place the dough ball in the bowl, turning it until the entire dough ball is coated with a thin layer of oil.
6. Cover the bowl with saran wrap and place it in a warm place that is free of drafts.
7. Let the dough set for an hour, or until it has doubled in size. 
8. When you are ready to work the dough, be sure to punch it down! 

To Prepare the Pizza
1. Prepare your grill by either turning it to a high setting, or getting the coals nice and hot.
2. While your grill is heating, cut three pieces of aluminum foil that are each approximately 1 foot long, and split your pizza dough into 3 equal parts, with each piece of dough going onto a piece of foil.  To keep your pizza from sticking to the foil after cooking, sprinkle some corn meal on the foil!  
3. Spread the dough into a circle by pressing from the inside of the dough ball out with the palm of your hand.
4. When you are happy with the size and thickness of your crust, pile on the toppings of your choosing - EXCEPT for the lettuce.
5. Turn down your grill to a low setting, or take the lid off for a few minutes.
6. Carry each of your pizzas to the grill by carrying it from opposite corners of the foil, and gently place it down on the grill.
7. Once all of your pizzas are on the grill, cover them and let them cook for approximately 10 minutes, or until the bottom of the crust is firm and brown, and the top is firm and cooked through.  The foil will stick just a little bit, so be sure you get all of it off before enjoying your meal!  A little corn meal on the bottom of the crust will greatly help prevent this!  
8. When your pizza comes off the grill, top it with a handful of romaine!

Wednesday, February 9, 2011

Layered Enchilada Bake and a Special Delivery

I had mentioned in last night's post, that Monday night we had dinner at my grandmom's.  We had such a delicious dinner, and I just had to share the recipe with all of you!  It was a recipe she got from a Kraft magazine. 

Layered Enchilada Bake
Yields 8 servings


Ingredients 
1 pound lean ground beef
1 large onion, chopped
2 cups chunky salsa
1 can (15 ounces) black beans, drained, rinsed
1/4 cup zesty Italian dressing
2 tbsp taco seasoning mix
6 flour tortillas
1 cup sour cream
1 package (8 ounces) Mexican style four cheese

To Prepare the Enchilada Bake
1. Heat the oven to 400 degrees.
2. Brown meat with onions in large skillet on medium-high heat, and then drain off the liquid.
3. Stir in the salsa, beans, dressing, and seasoning mix.
4. Arrange 3 tortillas on the bottom or a 13x9 inch baking dish.
5. Cover the tortillas with layers of half the meat mixture, half of the sour cream, and half of the cheese. Repeat this step with the remaining ingredients and cover with foil.
6. Bake for 30 minutes and then cook uncovered for 10 minutes or until the casserole is heated through and the cheese is melted.

My grandmom served ours with shredded lettuce, tomatoes, sour cream, guacamole, and jalapenos for topping our slice of casserole!

The official photo from the Kraft magazine...it looked this great at Grandmom's, too!
Late yesterday afternoon, I also got a special package in the mail from Panera Bread - yes, my book and gift card arrived after mucho waiting and impatience!  I am super excited to treat my family to dinner at Panera over the weekend!  The book I won is beautiful and I cannot wait to start working my way through all of the delicious recipes!  It is Artisan Bread by Eric W. Kastel.  The instructions are well written and the photos are beautiful!  My salivary glands go nuts whenever I thumb through the book!  I am CERTAIN I will have lots of bread pictures for all of you guys in the coming months! 

Tuesday, February 1, 2011

Just Another Meatless Monday

My grandfather always tells me to K.I.S.S. - Keep it simple, stupid!

The kitchen is the one place where I seem to forget that nice little acronym...

I should probably start by explaining that I come from a meat and potatoes family.  We have always had meat of some sort, a veggie, and a grain or potato at every single meal for most of my life.  There were, of course, rare exceptions.  I also had my attempts at vegetarianism while I was in college.  For me it was never about the cruelty of killing the animal, but more so about the fact that I really do not enjoy eating meat.  Call me crazy if you must, but I hate steak and I hate seafood!  Every time I tried to become a vegetarian I would do well until one of two events struck - Thanksgiving and 4th of July.  I just cannot turn down turkey and juicy burgers!  A one day slip would turn into a landslide of meat no matter how hard I tried to find my way back to the vegetarian path. 

Not having much experience with vegetarian dishes, I have viewed Meatless Mondays as a bit of a challenge.  The only exposure I ever really had to vegetarian meals was in college.  I attended a college that really put forth an effort in making appealing vegetarian meals and even had a vegetarian food line.  For those that were not vegetarian, the food was there to be played with while they waited for their turn in the sandwich line - I think it reminded people of play-dough sometimes!  Another reason I view Meatless Monday as a challenge is partially because I always feel like I need to present a completed "traditional" meal.  I also always feel like cooking should consist of a certain amount of work.  This week my dad and sister proved me otherwise...

While writing my grocery list on Saturdays, I always ask "Is there anything in particular you guys want for dinner this week?"  Normally I get groans and stares and they tell me to do what I want.  This week my dad actually chimed in with a request!  While writing my menu and list I was still pondering over Monday's meatless meal.  When my dad mentioned baked potatoes this thought hit me - there are so many meals that I make throughout the year that don't have meat in them that my family enjoys so much!  I quickly realized that I could swap out what little meat I do use in my Loaded Baked Potatoes and use that as a vegetarian meal.  Last week my sister's suggestion of an Ultimate Garden Salad was pretty straight forward, too. 

I have to sit back and wonder why I sometimes make simple things like that so difficult for myself.  I don't know if I just get caught up in the cooking and planning process, or if it is about enjoying the challenge.  What I have realized though is that sometimes there is an easy, yet delicious way out!  As much as I love being in the kitchen, sometimes I like an easy way out meal, too!  I cannot begin to tell you how much I enjoyed throwing the potatoes in the microwave and just heating up a few things on the stove top - what can I say, sometimes a girl just needs a break! 

For our baked potatoes, we enjoyed toppings that included cheddar cheese, onions, sour cream, broccoli, vegetarian chili, and Bacon Bits.  I should probably point out here that Bacon Bits are not actually meat, but rather, soy!  Sorry if I ruined them for you! 

What did I learn this week?  Despite the fact that I should K.I.S.S., my mind is already revolving around what next Monday's dinner will be!  I think after two weeks of vegetarian gone easy, I might need to pull out a showstopper next week...

Tuesday, January 18, 2011

Food Blog Succotash

So, tonight I have a mix of loose ends and things I have been meaning to tell you all about...

The Homemade Root Beer Epilogue

Last week, my sister and I made homemade root beer and waited patiently for it to do its thing so we could enjoy it.  Tonight, I finally decided to crack open a bottle and give it a try!  Well, I guess I will start with the good news - it tasted like root beer.  The bad news - it was not carbonated.  So now I have close to two gallons of non-carbonated root beer flavored water.  We followed the directions that called for an 1/8 a teaspoon of yeast to carbonate, so I think next time I am going to just up the yeast to a 1/2 a teaspoon and hope for the best.  Flat happens haha!

Limbuger Cheese

A few weeks ago, I made my way to our local Amish Farmer Market.  In search of organic milk and eggs at a good price, I made my way to the dairy kiosk.  I already had paid for my milk and eggs and had them in hand when I spotted the little silver brick sitting in the cheese case.  My brother told me not to do it, but I had to buy it and try it!  It has been sitting in the fridge in the pneumatically sealed package because I decided to wait until I got my sense of smell back so I could embrace its full effect.  This is where I am going to interject with - What the F%&# was I thinking?!  I should have known I was in trouble when my gag reflex kicked in as soon as the plastic wrapping came off of the package.  The smell hit me like horse crap in August!  Ok, I was prepared for this.  Over and over and over again I have been told that it is the best cheese I will ever eat if I can get it past my nose.  I really should have been worried when my dad refused to try it - he eats EVERYTHING!  As I cut through the silver packaging, which I should add was literally the only silver lining of this experience, I began to get worried because the smell got worse!  This is about where I start chanting, "Mind over matter" to myself.  The block of cheese itself was pretty and looked like gold marble, and for a brief moment, as the silver blade sliced through it, I thought, "This is going to be a religious experience!"  I cut off a small piece, cut it in half, and wrapped what was left.  My dad at this point became interested and caved in to try it with me.  He, the poor guy, fully committed to the entire piece of cheese, while I nibbled a corner off of my slice.  I knew we were in trouble as we ran for the trash can and a glass of flat homemade root beer.  I could not get the taste out of my mouth...thankfully the root beer flavor cut the grossness factor down a little bit!  Or maybe the Limburger cut down the grossness factor of the root beer?  I don't know why I put the block of it back in the fridge, but it is sitting there, as if one of us will break down and eat it with a pack of crackers!  The moral of this story: The farm that is producing this monstrosity had to have also produced the "If you can get it past your nose..." line!
 

This video pretty much sums up the experience...

Gulab Jamun

Tonight I made box mix gulab jamun, which is an Indian dessert.  I had picked it up a few months ago from our local Subzi Mandi, which is a cash and carry grocery store.  It is essentially an evaporated milk donut that is deep fried and soaked in sugar water.  The name is pronounced like goo-lahb-jew-mon, and it is a little slice of Nirvana!

Monday, January 10, 2011

Meatless Monday - Havarti and Kale Grilled on Seeded Rye with Tomato Soup

I should have known better than to venture into the kitchen while I was under the weather.  Dinner was good, but definitely NOT incident free...

Every now and then throughout the year I go on a new recipe binge.  I try out a bunch of new things, and then adapt them to my style and my family's tastes!  It looks like the binge came early this year.  

Rachel Ray got me again with the pictures of her Grilled Cheese and Kale Sandwiches with Tomato Soup.  It looked beyond yummy, and seemed like a good dinner for Meatless Monday.  With a storm a-brewin' to the west of us, and the temperatures steadily dropping, it seemed like the perfect combo!  Not to mention, I hoped that it would help my stuffed up nose along!

It seemed easy enough...

I forgot to pick up the havarti and bread at the grocery store when I did my shopping...greaaaat.

So today, on the way home from work, my dad and I stopped at the grocery store.  Not thinking, I had worn slippers in the car and couldn't go in the store, so I sent my dad in with a list and told him, "If they don't have havarti at the deli counter, get provolone."  What seemed like 40 minutes later he emerges...with havarti...in block form.  Crap.  Ok, so I will just slice it up when I get home...no biggie.  As I drive, I suddenly remember that someone, who shall remain nameless, ran my wooden cheese slicer through the dishwasher and cracked it beyond repair.  Hand slicing soft cheese...this is going to make for an interesting night!  At least he did me proud and picked up a real loaf of seeded rye in the bakery...bonus points for dad!

We get home and I get the havarti sliced in a decent amount of time, assemble 3 sandwiches, and start melting a pad of butter in the frying pan on medium heat.  Two sandwiches went in easily, and I dipped my kitchen brush in the melted butter and saturated the tops of both sandwiches.  I reached for my tried and true Campbell's Condensed and the milk and got the tomato soup going while they cooked.  After about 5 minutes on low to medium heat, the bottom layer of havarti had melted most of the way, so I flipped and pressed the sandwiches down with a spatula to help everything bind together.  My dad and sister's sandwiches came out of the pan and were the definition of perfection when I cut them in half and set them on a plate next to a heaping bowl of steamy tomato soup!

Then it quickly went downhill as I put my sandwich in the pan.  I threw another pad of butter in the pan forgetting that the heat was a little high.  It browned quickly and I though, "No biggie, I'll toss it in anyway'"  Yeah...not my best idea.  I thought it was ok, and dipped my brush in the butter to take care of the top piece of bread.  The brush MELTED IN THE BUTTER!
The burnt brush aftermath!
I scooped my spatula under the sandwich and started yelling for help.  My sister sauntered into the kitchen wanting to know what my problem was.  She got me a smaller frying pan for me and dropped a pad of butter in it.  I figured my sandwich was ready to flip and flipped it over into the new pan.  I burnt the bottom of my sandwich and the cheese didn't melt all of the way.  I managed to get it to melt most of the way and finally was able to enjoy my dinner!

After all was said and done, the grilled cheese was worth it and everybody loved it, but I guess I would have liked it more if mine had been a little less...cajun style?

Havarti and Kale Grilled on Seeded Rye 
Source: Every Day with Rachel Ray - February 2011
Yields approximately 5 sandwiches

Ingredients 
1 pound of havarti cheese
1 pound of kale
1 loaf of seeded rye bread
a few tablespoons of butter

To Prepare 
1. Melt a tablespoon of butter in a frying pan over low to medium heat.
2. Spread a layer of havarti on both sides of the bread.
3. Place a layer of deveined kale leaves on one side of the sandwich and close the sandwich.
4. Cook the sandwich in the melted butter over low to medium heat. For the optimal  golden brown buttery sandwich, spread some melted butter on the top side of the sandwich while it cooks!  When you flip it there will be some butter to brown and bubble!
5. After you flip it, press it down with a spatula so everything starts to melt together. 
6. Pull the sandwich out of the pan when the cheese has melted!
It didn't quite melt all the way because I was afraid of burning it more!  It was still delicious though!!
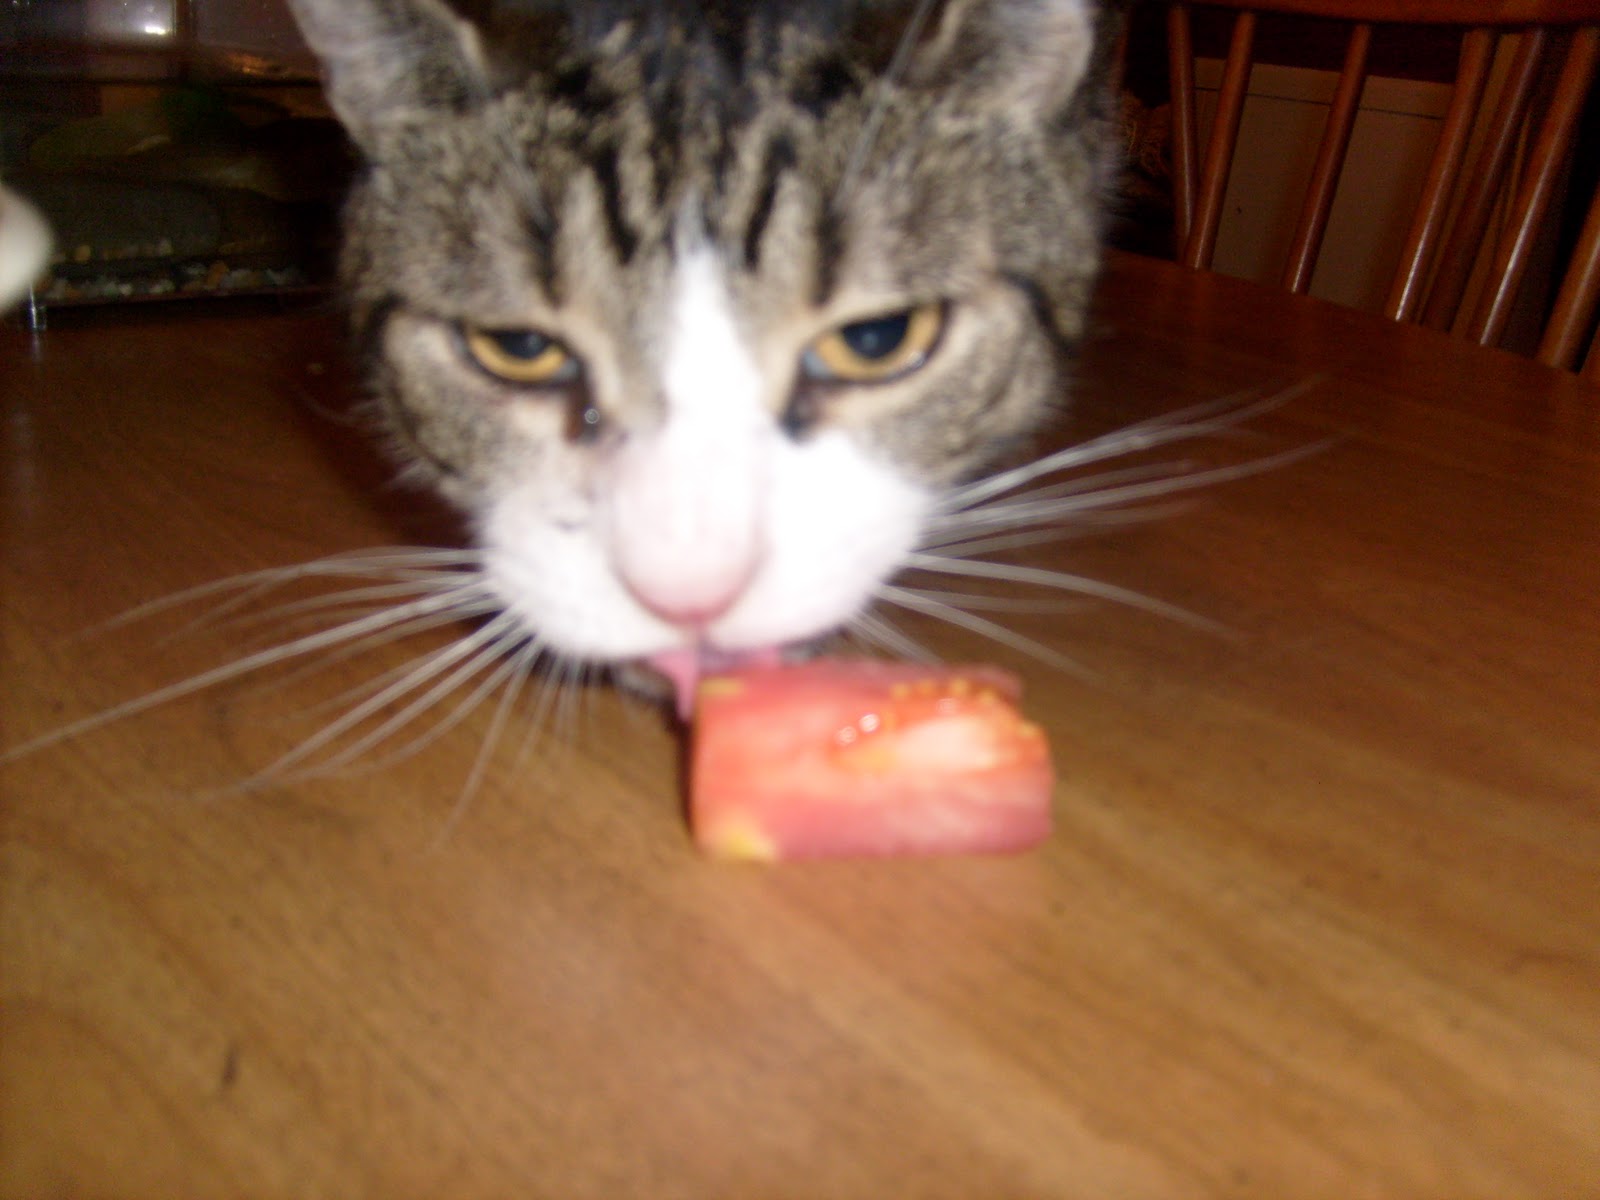
On a fun little side note, I have to show how absolutely adorable my cat Vinnie is!  He LOVES tomatoes, so any time we have fresh tomatoes or tomato soup, he puts on his "I don't want it face," and starts purring so loud that it sounds like a semi is coming through the house.  Tonight he was eating the spoon full of left over tomato soup off a spoon.  He has manners, what can I say?  Here are a few photos of him with a slice of tomato...


Thursday, January 6, 2011

Pizza Pizza!

Last night was homemade pizza night!  My Grandma Nancy has been making pizza at her house for at least 15 years.  Whenever we would make the ride out to Pennsylvania we would beg for her to make "Grandma Pizza"...it would only be a 5 hour drive to pick up our pizza order hehe!  She loads a fluffy crust with, in this order: sauce, parmesan, pepperoni, sausage, olives, and two kinds of shredded cheese.   It bakes and bakes and bakes, and when it finally comes out of the oven is bubbling, golden brown, and smells something beyond delicious!

When I asked my brother what he wanted for dinner this week, since he goes back to dining hall food this weekend, he said, "Grandma Pizza!"  I wanted to go Grandma's route, but couldn't afford the list of ingredients with the food budget, so I decided to go with a Barbecue Chicken Pizza and a Rustic Vegetable Pizza.

I made a crust from scratch with a recipe from my Kitchen Aid book, which I am now referring to as the Holy Grail.  I doubled this recipe to make 2 pizzas!

Crusty Pizza Dough 
Yields dough for 1 large pizza
Source: Recipes For Your Kitchen Aid Stand Mixer

Ingredients 
1 package active dry yeast (2 1/4 teaspoons)
1 cup warm water (105 degrees to 115 degrees)
1/2 teaspoon salt
2 teaspoons olive oil
2 1/2 to 3 1/2 cups all-purpose flour
1 tablespoon cornmeal

Dissolve yeast in warm water in warmed mixer bowl.  Add salt, olive oil, and 2 1/2 cups flour.  Attach bowl and dough hook to mixer.  Turn to Speed 2 and mix about 1 minute.

Continuing on Speed 2, add remaining flour 1/2 cup at a time, and mix until dough clings to hook and cleans sides of bowl, about 2 minutes.  Knead on Speed 2 about 2 minutes longer.

Place dough in greased bowl, turning to grease top.  Cover.  Let rise in warm place, free from draft, about 1 hour, or until doubled in bulk.  Punch dough down.

Brush 14-inch pizza pan with oil.  Sprinkle with cornmeal.  Press dough across bottom of pan, forming a collar around edge to hold toppings.  Add toppings as desired.  Bake at 450 degrees for 15 to 20 minutes.

I stuck fairly close to the recipe since I am still pretty new to the world of raised doughs, but I did make a few small changes because of what was available to me in my kitchen pantry.  I was out of olive oil, so I replaced it with white truffle oil, which just added to the flavor of the crust.  It did not changed the dough physically.  The only other change I made was the pan I used.  A pizza pan is not something I have added to my cooking arsenal yet, so I split the dough in two balls (remember...I made a double batch!) and spread it across to large baking sheets!  

And for the toppings...

On the chicken pizza, I poured a 18 ounce jar of BBQ sauce, 1 pound of chopped pan-seared chicken, and 2 cups of shredded white cheddar.

On the veggie pizza, I placed a handful of spinach leaves, sundried tomatoes, sliced black olives, shitake mushrooms, and a heavy sprinkling of parmesan cheese. 

The results are in... 


The Barbecue Chicken Pizza was a HUGE hit!  The Veggie Pizza, on the other hand, was good but missing something...I think it is called moisture!  Oops!  I really should have put some red sauce down on it, or opted for a shredded cheese that would have added some moisture while it cooked.  You cook, you learn...I'll have better luck next time hehe!

Thursday, October 21, 2010

Eggplant Parmesan

Many of my favorite vegetarian dishes revolve around pasta!  I knew when I started the menu for this week, the one dish that my dad would totally be ok with was eggplant parm!  He LOVED having this at home,  my sister (the veggie hater) on the other hand, was not happy at all.  I guess 2 out of 3 isn't bad haha.  I liked this recipe because it actually came out with a crispy crust and didn't get soggy.  I think eggplant parm tends to go wrong when you feel like you are chewing on rubber...yuck!  I will certify this as a rubbery free recipe! 

Eggplant Parmesan 
Yields 6 servings

To Prepare the Eggplant 
1. Peel 1 large eggplant.
2. Cut the Eggplant into 1/2 inch thick rounds.
3. Place the rounds into a sieve and sprinkle some salt on them.  This will make the eggplant wilt, which essentially means that we are removing excess moisture, and they are going into a sieve so they are not lying in the juices!
4. After the eggplant has wilted for approximately 30 minutes, take it out the sieve and pat the pieces dry with paper towels.
5. While the eggplant is drying, preheat your oven to 350 degrees.
6. Beat 3 eggs in a bowl, and set aside.
7. Pour 1 cup of bread crumbs onto a plate.  I used plain bread crumbs and seasoned them with some dry herbs, but you can definitely use the pre-seasoned!
8. Pour 1/4 inch of olive oil into a frying pan and start heating it on low heat.
9. While the olive oil is heating, dredge approximately 4 slices through the bread crumbs, and THEN coat them in egg.
All set up for dredging! From left to right: Eggplant, bread crumbs, egg, frying pan, casserole dish!
10. Fry the coated eggplant in the oil, and be sure to flip them once they brown on the first side!  When they are brown on both sides, remove them from the oil and place them in a casserole dish. Repeat this process until all of the eggplant is fried and in the casserole dish.
11. Evenly coat the entire casserole of eggplant with pasta sauce (it only should take 1 jar of sauce!).  If you want your eggplant to stay SUPER crispy, place it on a baking sheet, spoon a little sauce over the top of each piece, sprinkle with some cheese, and then bake it!
12. Top the sauce with 1/2 to 1 pound of shredded mozzarella, depending on how cheesy you want it!  I love cheese, so I used 1 pound!
13. Bake this in the oven for about 15 minutes, or until the cheese is melted and starting to brown.
I served mine over pasta, but it would be good as an eggplant parm sandwich, or along side of some fresh steamed veggies!

Sunday, October 17, 2010

Ham Casserole

This is one of those things that I grew up eating, and never knew where my mom got the recipe from, but we all loved eating it, especially when it got cold out!  It is definitely a kid friendly dish...noodles, peas, ham and cheese!  It is colorful, and little ones can eat it with their fingers after it cools a little bit!  It also makes delicious left overs, and is even better the day after!  

Ham Casserole 
Yields 8 servings

To Prepare the Casserole 
1. Pre-heat your oven to 350 degrees.
2. Boil 2 boxes of tri color fiori.  This will be approximately 24 ounces of pasta.  We normally use elbow noodles, but I already has the fiori in the pantry and decided to go with them.  They tomato and spinach in them added to the flavor of the casserole, and it made it look really pretty when it was done!
3. Once the pasta is done cooking, drain it and put it back in the pot you cooked it in, or in a large bowl.
4. Mix in 1 pound of thawed frozen peas.
5. Mix in 2 packs of pre-diced ham cubes.  You can usually find this in vacuum sealed baggies in the meat section of the grocery store with the ham products!  It works out to being about 1 pound of ham, so if you cannot find the cubes, you can cut 1 pound of ham steak into cubes and add it in to the mixture!
6. Mix in 1 pound of extra sharp shredded cheese.
7. Pour the entire mixture into a casserole dish.
8. Bake at 350 degrees for approximately 20 minutes, or until the cheese has melted and the top has started to turn golden brown!

Thursday, October 14, 2010

Cheesy Turkey Casserole

This is a recipe my mom came up with about 10 years ago the week after Thanksgiving!  After cooking a 50 pound turkey (for 5 people), we had TONS of leftover turkey!  We also had a lot of Wild Rice leftover, too.  All of the leftovers, combined with my mom's need to sneak my brother and sister veggies, brought this recipe to life!


Cheesy Turkey Casserole
Yields 6 - 8 servings

To Prepare the Casserole
1. Pre-heat your oven to 350 degrees. 
2. Prepare 2 boxes of Uncle Ben's Wild Rice per the directions on the box.
3. While the rice is cooking, pan sear approximately 1 pound of turkey in olive oil over medium heat.  You could also use chicken, or even ground turkey or chicken...just be sure, whichever you choose, that you cook it!  If you are using leftover turkey or chicken, you will just need to break it up into 1 inch pieces!
4. Pour the rice into a large casserole dish, and spread it out evenly. 
5. Next you will need to prepare 2 1/2 pounds of broccoli.  I used chopped frozen broccoli that I thawed.  If you are going to use fresh broccoli, you will need to boil it first!  Once your broccoli is either defrosted or cooked, spread it evenly across the rice!
6. Spread the meat evenly on top of the broccoli layer.
7. Top the whole casserole with 1 pound of sharp cheddar cheese.
8. Bake the casserole for approximately 30 minutes or until the cheese is melted and golden brown!

Wednesday, October 13, 2010

Baked Ziti with Sage Sausage

I know a lot of you would not necessarily consider baked ziti a casserole, but this is how I look at it: A casserole is usually some sort of meat (sausage), a grain of some sort (ziti), sauce/veggie (tomato sauce), and cheese (mozzarella and ricotta).  Let us just say it is Italian casserole hehe!  

Baked Ziti with Sage Sausage
Yields 6 - 8 servings

To Prepare the Ziti
1. Pre-heat your oven to 350 degrees! 
2. Open a one pound tube of sage flavored sausage.  You know the stuff...the breakfast sausage that you cut and fry!  Brown the sausage in a frying pan, and break it up a with a spatula.  It will break down more and more as it cooks!
3. Bring a pot of water to boil, and cook 1 pound of ziti.  Don't cook it all the way, but just a little bit past the al dente state!
4. Once the pasta is cooked, drain it and leave it in the sieve.
5. Using the empty pot you cooked the pasta in, mix together approximately 25 ounces of pasta sauce, 1 pound of shredded mozzarella cheese (hold back some of the mozzarella to top the casserole), 1 pound of riccotta cheese, and 2 large eggs.
6. Once all of these ingredients are mixed, add the pasta and sausage in!
7. Pour the mixture into a glass casserole dish and top with the mozzarella you left out of the sauce. I sprinkled a little dash of parsley flake on top of the cheese, but you could also top it with a basil leaf, some fresh oregano, or some fresh parsley if you want to!
8. Bake for approximately 15 minutes, or until the cheese on top has melted and is just starting to brown!

Monday, October 4, 2010

Mac and Cheese...Help Needed!

This is one of those recipes I just cannot seem to get to work right, so I need your help, readers!  I'll give you the run down of what I did...do me a favor and read through, and please help me out with any tips you may have, or tricks you use (if you are willing to share them)!  The taste this time was much better than the one I made before, but this time, the consistency of the sauce was TOTALLY off!  I might have to give up on making mac and cheese soon if I don't start getting it right!

Mac and Cheese
Yields 6 generous servings

To Make the  Mac and Cheese
1. Bring 3 cups of whole milk to a boil in a large pan.
2. Add 2 tablespoons of cornstarch or flour to the milk and blend well.
3. Add 24 ounces of shredded Monterey Jack and Colby mix cheese.  Add the cheese in small quantities, making sure to blend it into the milk until it is melted and fully incorporated into the sauce.

5. Once all of the cheese is mixed into the milk, add uncooked elbow macaroni.  I have tried doing the macaroni both ways...cooked and uncooked...but I think the sauce holds up a little better when I add cooked macaroni.
6. Heat the oven to 350.
7. Put the mac and cheese in a casserole dish and top with 8 more ounces of shredded cheese.
 8. Bake until the pasta is tender and the top of the casserole is golden brown and melted.

Saturday, September 4, 2010

Artichokes with Tomme de Savoie Cheese Sauce

Oh Trader Joe's...you never let my culinary whims down!  After making the trek to Trader Joe's (a 30 minute drive from hell), I returned home with the impulse purchase of 2 artichokes (69 cents each), and a 1 pound block of Tomme de Savoie cheese.  What to do?  What to do?  My family quickly reminded me to check my copy of Mastering the Art of French Cooking to see what Julia Child would do...Eureeka!  The artichokes were boiled, and I turned the cheese into a sauce for dipping.  It doesn't sound like a lot to eat, but my brother and I were stuffed to the gills and beyond satisfied with our makeshift meal!  I also had a whole new appreciation as to why artichoke hearts are so freakin' expensive!

To Prepare the Artichokes
1. Break off the stem at the base of the artichoke and even out the base of the artichoke with a knife so it will sit flat on a counter or plate.
2. Trim off approximately 3/4 inch off the tip of the artichoke.
3. Cut off the remaining visible leaf tips with a pair of clean scissors.
4. Boil the artichokes in salted water with a cover on the pan for 45 minutes to an hour.  Stir them occasionally so they cook evenly, but for the most part you can pretty much forget about them until the hour is up! 

To Prepare the Sauce
1. Melt 2 tablespoons of butter over low heat and mix in 1 tablespoon of flour.
2. Once the flour has dissolved into the butter add 1 cup of milk (whole milk is best).  This is a french cheese sauce base known as Bechamel Sauce.  As soon as you add the cheese in the next step it becomes what is known in French and Italian cuisine as a Mornay Sauce!
3. While you are waiting for your milk to come to a boil, cut approximately 1 pound of cheese into small pieces or grate it so it will melt easily.  I chose to use Tomme de Savoie cheese, but you can use any cheese you like!  Tomme de Savoie has a dark rind and the cheese itself has a brown tone to it.  It has an earthy flavor that I would compare to mushrooms. 
4. Once the milk sauce comes to a boil, slowly add the cheese in small amounts, being sure it is melted before adding more. 
5. After all of the cheese is added and melted cook it for a few minutes longer to be sure everything is incorporated well.

To Serve
1. All you will need to do is place the artichoke on a plate
2. Pour the sauce into a bowl for communal dipping, or individual bowls if you don't like to share!

To Eat
Artichokes are not one of those foods many people discuss, especially how to eat it!
1. Starting from the outside of the artichoke, you will peel off a leaf (which will come off easily after cooking), dip it into the sauce, and then use your teeth to pull the meat of the artichoke off of the leaf.  You will not actually eat the entire leaf, but merely pull the leaf meat off.
2. As you get closer to the center of the artichoke you will find the leaves are much more tender, and you can eat the whole leaf.  This is part of what you will find jarred in the pickle aisle of your grocery store and labeled as artichoke hearts!
3. Once you have worked your way through the center you will be left with the round base of the artichoke.  There will be a thickly packed hairy layer that will easily peel apart from the base of the artichoke...don't eat this hairy layer, but the layer under it (the base of the artichoke) is absolutely DELECTABLE!!!

Related Posts Plugin for WordPress, Blogger...