Showing posts with label Vegetables. Show all posts

Monday, February 21, 2011

Vegetable Puffs

Another Meatless Monday has come and gone! 

I wanted something different this week that was not going to be a production, and considering how much we have been going out to eat, I definitely wanted to kick up the healthy factor!  What I really loved about making this dinner was all of the beautiful and rich colored foods that go into it - it was a real pick me up for a gloomy day!  This recipe makes 6 thick slices if you are serving them along side something else, but if you are eating them on their own, I would say it makes 3 generous servings.

I was also beyond excited at the grocery store when I came across two new products that helped this dish along - Philadelphia Cream Cheese Cooking Cream and Pillsbury Seamless Crescent Roll Dough!   So with that being said, let's get to the recipe and pictures!

Vegetable Puffs
Yields 6 hearty slices

Ingredients 
1 large red bell pepper, seeded and chopped
1 broccoli crown, chopped
1 large carrot, peeled and chopped
1 small onion, peeled and diced
1 can of black beans, drained and rinsed
6 ounces of spinach leaves
10 ounce container of Philly Cooking Cream in the Italian Herb and Cheese Flavor
2 rolls of Pillsbury Seamless Crescent Dough

To Prepare the Puffs
1. Pre-heat the oven to 350 degrees.  
2. Pour the bell peppers, broccoli, carrots, onions, and black beans into a large skilled over medium heat. 
3. After approximately 10 minutes of cooking, add the spinach.  It will look like A LOT of food, but the spinach will cook down quite a bit! 
4. Cook for approximately 10 more minutes, being sure to stir it often. 
5. Add the cooking cream, and coat the veggies completely.
6. Shut the vegetables off. 
7. Spread out one of the crescent dough sheets on a piece of parchment paper on a baking sheet.
8. Spoon the vegetable mixture onto the dough, being sure to leave a one inch border. 
9. After all of the vegetables or spooned on, fold the dough up onto the veggies to create an edge or barrier.
10. Place the other dough sheet on top of the vegetables, and tuck and pinch it under the puff. 
11. Bake the puff at 350 degrees until it is a deep golden brown color!
 

Tuesday, February 8, 2011

Vegetarian Stew

Last night my grandmom had our family over for dinner.  We had a DELICIOUS enchilada casserole, and will be posting that recipe soon!  That being said, Meatless Monday had to be put off until tonight!  This week, for Meatless Monday, I made a vegetarian stew.  With my favorite produce store going out of business, I was forced to buy frozen vegetables.  When I am put in a bind like this, I always opt for frozen over canned.  Frozen veggies are a smidgen better for you and retain a good portion of their nutritional value!  If you are using frozen veggies for this recipe, be sure they are defrosted, and if you are using canned veggies, be sure to strain the excess liquid off of them before adding them to the pot! 

Vegetarian Stew 
Yields 6 generous servings


Ingredients 
1 small onion, peeled and diced
2 large potatoes, washed and cubed
1 carrot, washed and diced
8 ounces corn kernels
8 ounces green beans
8 ounces peas
28 ounces pureed tomatoes
3 cans water
8 ounces of whole wheat pasta (I used fusilli) 
Salt
Pepper
Paprika

To Prepare the Stew
1. In a large stew pot, add the onions, carrots, and potatoes.  Heat them over medium heat while constantly stirring. 
2. When the onions have started to become translucent, add the corn, green beans, and peas. 
3. Stir everything together well. 
4. Add the pureed tomatoes and 2 cans of water. 
5. Cook over medium heat.
6. When the liquid comes to a boil, season with the salt, pepper, and paprika to taste. 
7. Add the pasta. 
8. Add the last can of water as needed to make the stew as thick or runny as you prefer it to be.  
9. When the pasta has cooked through and the potatoes are soft, your stew is ready!

Thursday, November 11, 2010

Red Wine Beef Stew

When the weather really starts to turn cold, I always start to make more dishes that I like to refer to as "Belly Warmers".  These are the meals that are filling, and make you feel warm and cozy from the inside out!  Amongst our favorites are beef and chicken stews.  My mood while grocery shopping will determine whether or not is a thick stew, or more like a chunky soup.  This time around, I wanted a thicker stew with more of a gravy sauce.  Sick of the regular brown gravy, I decided to try a red wine gravy.  My family really enjoyed it and said that this was their favorite batch of the stew that I have ever made...which just proves that booze makes everything better!

Red Wine Beef Stew
Yields 8 servings

To Prepare the Stew 
1. Preheat your oven to 350 degrees.
2. Using a pan that is both stove top and oven safe, heat 1 or 2 tablespoons of olive oil over medium heat.  If you do not have a pan that is made for both on and in the oven, cook your meat in a frying pan on the stove top.
3. Sear approximately 1 pound of either stir fry cut beef or cubed stew meat in the olive oil.
4. While the beef is cooking, peel a small onion and cut it into approximately 8 wedges.
5. Add the onions to the beef and continue to cook everything until the beef had browned and the onions have turned translucent.
It's gettin' pretty steamy in there!
6. While the beef and onions cook, you can prepare your other vegetables!  Wash your potatoes and carrots, and peel them if you choose to.  If you are using fresh green beans, you will need to wash them and cut the ends off of them.  If you are using fresh corn, you will need to shuck it and rinse it with some cool water.  Remember to keep an eye on your beef and onions while you do this, and turn them off when they are done cooking!
7. Cut approximately 2 pounds of carrots into 1 inch lengths and add them to the beef and onions.  If you are using an oven safe and stove top safe dish, add the carrots directly to it.  If you are using something that is only oven safe, transfer the beef and onions over to that pan with the carrots! 
8. Add 1 pound of green beans, 1 pound of thawed frozen peas, and the kernels of 3 ears of corn (or approximately 1 pound of thawed frozen corn kernels).  If you are opting for canned veggies, use 2 drained cans of each veggie for the serving size above (8), or 1 can for 4 servings!
9. Cut 1 pound of potatoes lengthwise, and then cut them 3 to 4 times width wise, and add them to the pan.
10. Pour 1/4 a cup of red wine over the entire mixture, cover the pan with either a lid or foil and bake it in the oven for approximately 1 hour.  The culinary jury is out on what kind of wine to use.  Most professionals will tell you to only use a wine to cook if you would drink it on its own.  Personally, I have had pleasant experiences with cooking wines, and used one for this recipe.  I really like the Holland House brand (found at most grocery stores)!
11. To prepare the red wine gravy, heat 4 tablespoons of butter in a sauce pan with 2 level tablespoons of flour.  Heat and mix these two together until they become a bubbling paste! 
12. Add 1/2 a cup of red wine to the flour/butter mixture and heat it until it thickens.   Add salt and pepper to taste.
13. Pour the red wine gravy over the stew and mix it in so everything is coated. 
14. Cook for approximately a 1/2 hour longer, or until the potatoes are easily pierced with a fork. 
15. Enjoy over rice, or on its own with a glass of red wine!

Tuesday, November 9, 2010

Fresh Cut Corn Kernels

I never realized that cutting my own kernels is just as easy as cracking open a can or frozen bag of corn kernels!  They were so crunchy after they were cooked, as opposed to the soggy canned stuff!  It was really yummy and I am looking forward to making them again! 

Fresh Cut Corn Kernels 
Yields 6 servings

To Prepare the Corn
1. Shuck the three corn of their leaves and hair, and then rinse them off with a little cool water.
2. Hold the corn upright on a plate or cutting board, carefully place the knife amongst the kernels on the top of the cob.
3. CAREFULLY while watching the placement of your fingers, run the knife down the cob, cutting the kernels off as you go.  Do this all the way around the cob, and to the remaining 2 cobs. 
4. Boil all of the kernels over medium heat until they soften a little bit in boiling water. 

Oven Roasted Chicken with Aromatic Vegetables

With Thanksgiving just about 2 short weeks away, my taste buds are growing impatient for all of those delicious smells and tastes of the day.  With that being said, I could not resist the 59 cents per pound oven roasters at the grocery store this past weekend!   I didn't want to go the whole route of stuffing though, and decided to go with aromatic veggies, especially after I saw the gorgeous carrots at the store (you'll see why in the picture below).  Oven roasters are a great way to practice for Thanksgiving.  Whether it is the first Thanksgiving you are cooking and are afraid of making mistakes or are nervous about the turkey process, or if you want to try some new flavors by the way of sauces, marinades, and toppings before the big day, an oven roaster makes perfect practice!

To Prepare the Vegetables
1. First be sure to clean and peel the carrots, peel the onion, and clean the celery stalks.
2. Cut a large onion into wedges.  A large onion should make approximately 10 wedges.
3. Place the onions in the bottom of a very deep roasting pan (you will need aluminum foil later), or a cast iron casserole with a lid (approximately 7 quart capacity). 
4. Cut approximately 2 pounds of carrots down into 1 1/2 inch to 2 inch lengths and scatter them evenly on top of the onions.
Found these beautiful bundles of carrots at the grocery store...just one of those simple little things that leaves me grinning the in kitchen for hours on end!
5. Cut approximately 1 pound of celery on a slight angle in 1 inch to 1 1/2 inch lengths and scatter them across the top of the onions and carrots. 

To Prepare the Chicken 

1. Be sure to have a sink that is clear of all dishes and that has been washed with mild soap and was thoroughly rinsed!
2. Place the ENTIRE package of chicken in the sink, and then cut it out of its wrappings.  This will help keep your kitchen from being thoroughly contaminated with raw chicken juices!  I will also recommend bringing your trashcan over to the sink and lifting the wrappers right out of the sink and putting them in the trash bag!
3. Check both the neck and tush areas for any baggies of giblets.  Most people think that they are only packed with turkeys, but this is not always true, and you do not want the surprise of the baggie meeting you as you cut your dinner!  At this point, if you do have a baggie of giblets, you can toss them if you prefer to, or you can keep them to cook up gravy, treat your pets, etc.
4. Wash the chicken clean with water both inside and out!
5. Let the chicken settle for a few minutes in the sink so the excess water can drain off, and then place it on top of the vegetables. 
6. Rub the exposed areas of chicken with some olive oil (or if you prefer, butter).  This will give the skin that oh so appealing crispy brown color that is so hard to resist!
7. Sprinkle the top of the chicken with a little coarse sea salt and black pepper.
8. If the baking pan you are using has a lid, put it on, or if you are using something that does not have a lid, make a foil tent over the entire pan!
9. Bake everything until the button pops, being sure to baste along the way if you pan is not self basting(see below)!  It took about 2 1/2 hours for mine to cook all of the way, but keep in mind that it was not stuffed!  You may need a little longer if you decide to stuff yours!
So delicious!!!


A Few Tips/Suggestions/Fun Facts
1. I'd like to take a minute to talk about self-basting casserole pans!  I splurged last year on a Martha Stewart Enamel Cast Iron Oval Casserole during last year's after Christmas sales (You can thank me for the shameless plug later, Martha hehe).  Only after getting home and opening the box to inspect my new toy, did I notice the nodules, or as I like to call them, cooking stalactites!  These nodules actually collect moisture from the lid as your meal cooks and drips it down back onto the food slowly.  What does this mean, you may ask?  To me it means not trying to remove a pan from the oven or have it teeter on the edge of the rack, open it while wearing an oven mitt, trying to maneuver a baster in the oven while trying not to burn your wrists and forearms, no more cursing with half your body in the oven, etc!
Some pretty sweet enamel-wear stalactites hehe!
2. If you don't want to layer the veggies, or don't have the space in your baking dish for that kind of height, you can stuff the chicken with them!  You get the same delicious flavors with both the chicken and vegetables!
3. In place of using Butter/olive oil and salt and pepper, you could use a seasoned or herbal butter to add some real big flavor punches to the finished dish! You can also sprinkle some poultry seasoning on top of the butter/olive oil.  Some other great options are: put sprigs of fresh herbs between the skin and meat for a delicious feast for your belly and your eyes, Inject the meat with juice or herb marinade, or top it with a chutney an hour before pulling it out of the oven.  One of my favorite Thanksgiving chutneys is as simple as heating up some cranberry sauce with a splash of OJ!
4. Do you know that a group of chickens are called a Peep?  I bet the name of that marshmallow Easter treat makes a whole lot more sense now!
5.  If you are going for presentation, make sure the breast side of the chicken is facing up, but if you are looking for super moist meat, cook the chicken with the breast side down!  I made this mistake once, and the meat was amazing.  Let's just say that when I do this now a days, it is by choice, not ignorance hehe!
6. When I make a dinner this large, I like to use a crudites (vegetable) tray to store the left overs!  It keeps everything nice and neat, and you don't have to dig in the fridge for 4 or 5 bowls!
Working clockwise from 12 o'clock: Gravy, Fresh Cut Corn Kernels, Roasted Chicken, Aromatic Veggies, and Mashed Potatoes.

Monday, October 11, 2010

Easy Shepherd's Pie

Episode after episode of Kitchen Nightmares, I watch Gordon Ramsay convince restaurant owners and chefs to add his family's Shepherd's Pie recipe to the menu.  I have finally caved and tried Shepherd's pie (not the Ramsay recipe), and LOVED it!  My dad and sister really enjoyed it, and in fact my dad is on his THIRD helping as I type this!  I kept this recipe nice, simple, and quick to make, as the whole point of a casserole is ease and simplicity.  You can click to check out the difference between this make-shift pie and an authentic one.  Overall the major difference is the sauce.  I have used beef gravy, while an authentic pie uses red wine, chicken stock, Worcester sauce, tomato sauce, and seasonings. 


Shepherd's Pie
Yields 6 servings

To Prepare the Pie
1. Brown approximately 1 pound of ground lamb meat.  I went for the authentic lamb option, but you can definitely go the route of beef, chicken, turkey, or loose tofu!
2. Dice one small onion, and 2 cloves of garlic.  If you are using pre-chopped garlic, use 1 tablespoon!
3. Add the onions and garlic to the lamb.
4. After the lamb is browned, mix it in a large bowl with 2 bottles of gravy (approximately 24 ounces).  Again, I opted for a beef gravy, but you could use mushroom gravy too!
5. Mix approximately 2 pounds of mixed vegetables with the lamb and gravy.  I used the mix that has corn, lima beans, green beans, carrots, and peas!
6. Make two pouches of instant mashed potatoes (or 1 entire box of the Betty Crocker mixes).  I opted for the creamy butter flavor, but you could definitely use another flavor...something like butter garlic, or four cheese, would taste yummy!
7. Pre-heat your oven to 350 degrees.
8. Pour the veggie and meat mixture into a casserole dish.
9. Top with the mashed potatoes.  I chose to pipe mine one with a cake decorating bag and tip, but you can also spread them evenly and give it some texture by running a fork through it!  You definitely want to give it a little texture though, because that is the part that is going to brown and give it a little crunch!
10. Bake for approximately 30 minutes, or until the topping is browning on the peaks, and the sauce is bubbling throughout the casserole!


Wednesday, September 15, 2010

Cheater Chicken Pot Pie

I love chicken pot pie, but sometimes I have a tight schedule to work around, or I just don't feel like going through the labor intensive work of pie dough, cooking fresh veggies, making sauce...you get the idea!  It is exhausting just typing and reading it!  When the craving hits, I cheat!  I like this recipe because it has lots of veggies, but to make it easy on myself I use the canned vegetables!  The can vegetable flavor is masked pretty well by the sauce and biscuits.  It is a quick, easy meal that is filling and leaves everyone running back for seconds! 

Cheater Chicken Pot Pie
Yields 6 servings


To Prepare the Chicken
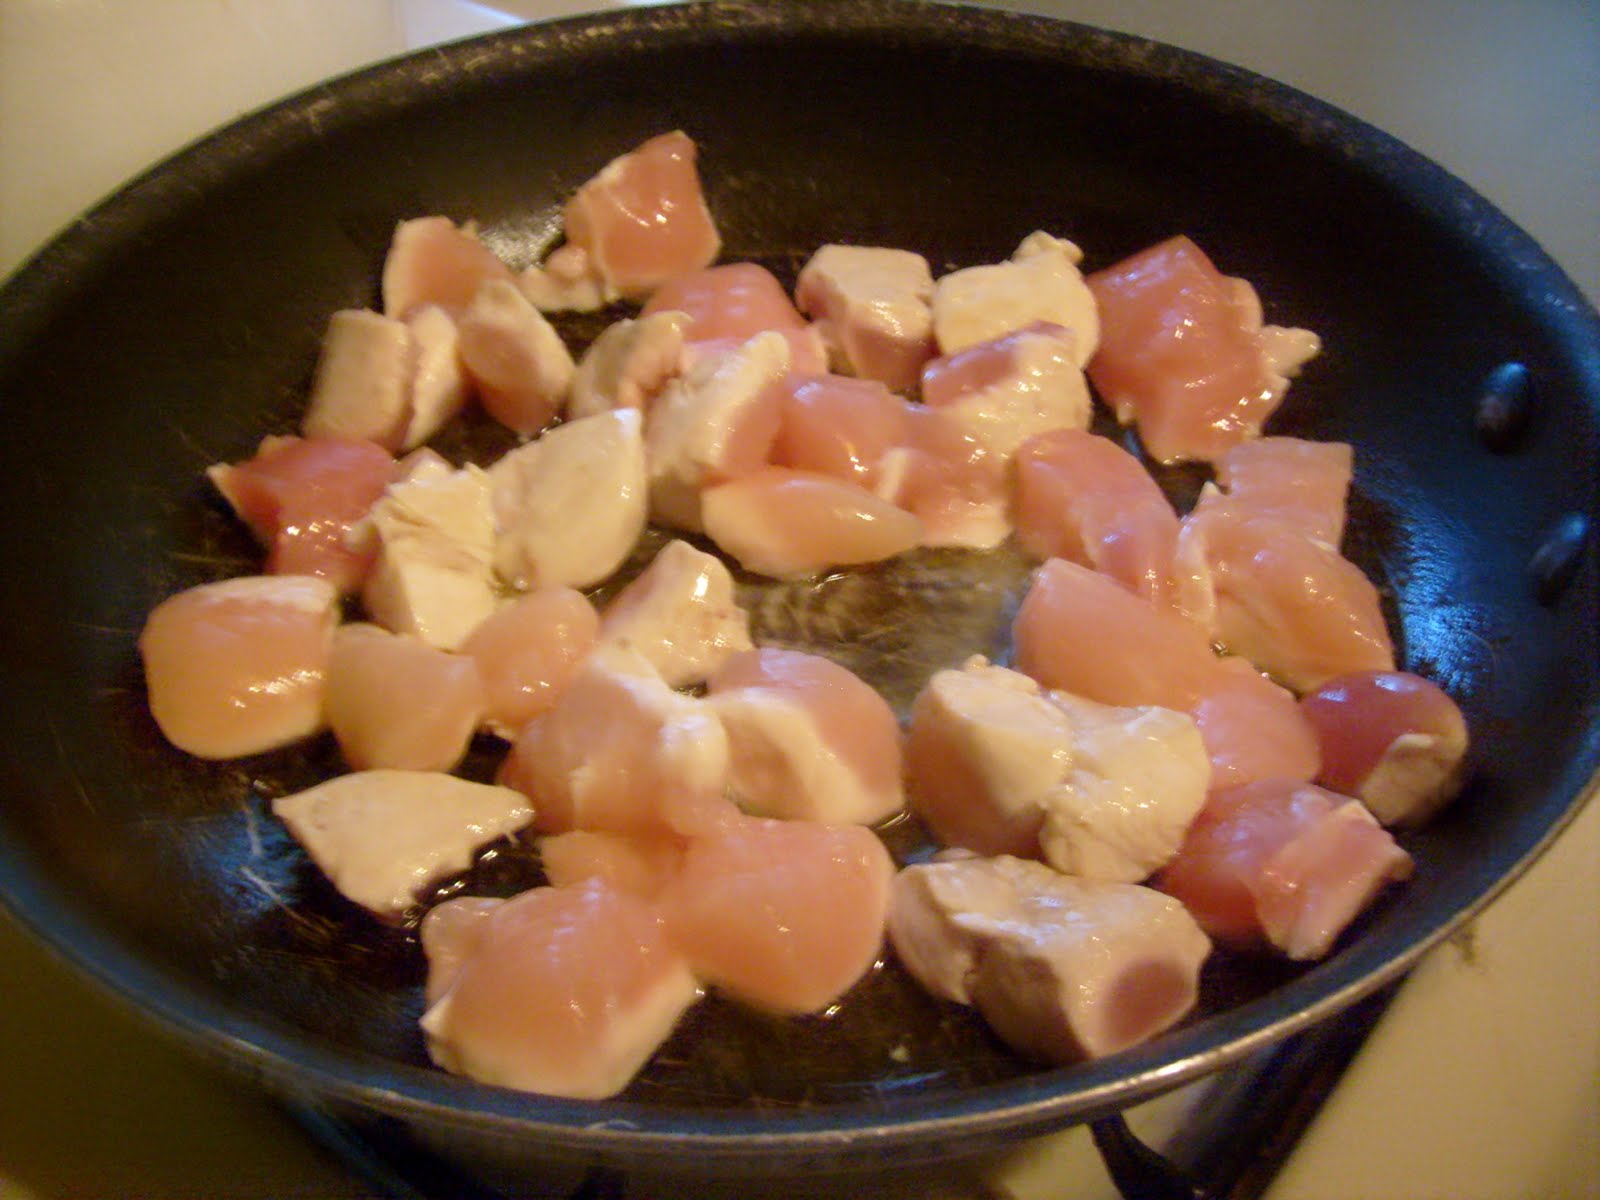
1. Heat some olive oil in a frying pan.
2. Cut 1 pound of chicken down to 1 inch cubes.

3. Right before the chicken finishes cooking, put a sprinkle of salt and pepper in the pan.

To Prepare the Vegetables 
1. Drain 5 cans of veggies and mix them together in a bowl. I usually use potatoes, corn, peas, green beans and carrots!

2. Add 2 cans of Campbell's Condensed Cream of Chicken soup to the veggies, but do not add water to it!  I don't like using chicken or turkey gravy...I feel like the flavor falls flat! 

3. When the chicken is done cooking, add it to the mixture.


To Finish the Pot Pie
1. Pre-heat your oven to 350 degrees.
2. Put the veggie/chicken/sauce mixture into a glass casserole dish.

3. Bake this for 15 minutes.
4. After cooking, bring the casserole out of the oven and top it with biscuits.  I get the pillsbury type biscuits that are labeled as "flaky" or advertise as able to be pulled apart in layers.  Pull the layers of the biscuits apart.  Each biscuit should easy break up into 3 or 4 more biscuits.  If you don't want to top the casserole with biscuits, you can bake the biscuits, slice them in half, and serve the casserole in between.  You can also mix dry Stove Top with its seasoning packet and top the casserole with that!
5. Layer the biscuit pieces like fish scales across the top of the casserole, and put it back into the oven until the biscuits are golden brown. 

Tuesday, September 14, 2010

So Fresh and So Green Green

After tonight's broccoli debacle (fungus...gross), I decided it might be a good idea to discuss the proper storage and shelf life of common fruits and vegetables, especially since we are taking a look at vegetable dishes this week!  How you store your veggies and fruits will affect their texture and flavor, and of course, the better the texture and flavor, the more likely we are to enjoy eating them!

Veggies

Artichokes - Keep in a dry plastic bag.  Will last several weeks at room temperature, or 2 weeks in the fridge.
Asparagus - Break off some of the bottoms, and place upright in 1 inch of water and refrigerate.  Will last 7-10 days. 
Broccoli - Keep in the fridge.  Will last 1 week.
Brussel Sprouts - If they are harvested on the vine, hand them upside down and store dry at a cool temperature and they will last 1 month.  If they are harvested individually, they will last 7-10 days in the fridge.
Cabbage - Will last several weeks in your fridge's crisper drawer.
Carrots - Will last up to 4 weeks if refrigerated in a bag in a crisper drawer.
Cauliflower - Will last for a week in the fridge.
Celery - Will stay crisp for a week in the fridge.
Corn - Should be eaten immediately since it loses its sugar content and turns starchy quickly! 
Cucumber - Will stay fresh in the fridge for 7-10 days.  Don't store it at too cold of a temperature or the flesh will go bad.
Eggplant - Will stay fresh in the fridge for 7-10 days.
Garlic - Keep it dry and at room temperature in the mesh baggy.  If you are able to, hang it!
Lettuce - Will last 7-10 days in a fridge crisper.  Not using steel edges to cut it will also keep it from browning and going bad quickly!
Mushrooms - Will last 5 days in the fridge.  Don't store them in a plastic bag though!
Onions - Will last for 2 weeks if stored in a cool, dry place.  They are best if stored in a mesh bag or hanging basket with air circulation.
Peppers - Will last in the fridge for a week.
Potatoes - Will last for a few weeks if kept in a cool, dry place with good circulation. 
Radishes - Will keep for 7-10 days in a fridge crisper.
Spinach - Will hold for a week in the fridge, but really should be cooked/eaten immediately.
Sweet Potatoes - If you do not wash them before storing them in a cool dark place, they will last up to 4 months!
Tomatoes - Will last 2-4 weeks if refrigerated, but they tend to lose their flavor over long periods of time.
Zucchini - If you do not wash before storing, they will last 1 week in the fridge.

Fruits 

Apples - When stored in a cool dark place, will last up to 4 months.
Bananas - Will last 5-7 days, but need to be kept at a temperature above 58 degrees to avoid freezer burn. 
Blackberries - Will only last 1 or 2 days and should not be washed until they are ready to be eaten.
Blueberries - Will last a few days when stored in the fridge.
Canteloupe - Will last 7 days when stored at room temperature.
Honey Dew - Will last 7 days when stored at room temperature.
Lemons - Will last for several weeks at room temperature.  Don't store in the fridge because the lemons will absorb the flavors of your fridge!
Limes - Will last for several weeks at room temperature.  Don't store in the fridge because the limes will absorb the flavors of your fridge!
Mangos - Will last 5-7 days when ripened at room temperature in a brown bag and then moved to the fridge. 
Peaches - Will last 5-7 days when ripened at room temperature in a brown bag and then moved to the fridge.
Pears - Will last 5-7 days when ripened at room temperature in a brown bag and then moved to the fridge.
Pineapple - Will ripen in 2-3 days when stored upside down at either room temperature or in the fridge.
Plums - Will last 5-7 days when ripened at room temperature in a brown bag and then moved to the fridge. 
Raspberries - Will only last 1 or 2 days and should not be washed until they are ready to be eaten. 
Strawberries - Will last a few days when stored in the fridge.
Watermelon - Will last 7 days when stored at room temperature.

Monday, September 13, 2010

Get Your Greens...Through a Straw!

Some of us just really hate our greens!  You can taste them no matter how mushed down and pureed they are, and no matter what you mix them with they always are there!  Over the last few years, many drink corporations have tried to trick us into drinking our veggies.  Here is a break down of what is currently on the market! 

V8 introduced their V8 Fusion juices in an effort to help us all get our servings of fruit and veggies daily.  Personally, I can still pick out the flavor of the veggies in these juices, and find the consistency of the juice not to appealing.  A lot of kids (and adults) are not fooled by their trickery!

The V8 Flavors are:
Strawberry Banana contains the juice of 10 vegetables and fruits: sweet potatoes, carrots, tomatoes, beets, white grapes, oranges, apples, strawberries, bananas, banana puree.
Tropical Orange contains the juice of 6 vegetables and fruits: sweet potatoes, carrots, yellow tomatoes, white grapes, oranges, pineapple.
Peach Mango contains the juice of 8 vegetables and fruits: sweet potatoes, yellow tomatoes, yellow carrots, carrots, white grapes, oranges, peaches, mango puree.
Pomegranate Blueberry contains the juice of 8 vegetables and fruits: sweet potatoes, purple carrots, tomatoes, carrots, apples, white grapes, pomegranates, blueberries.
Acai Mixed Berry contains the juice of 8 vegetables and fruits: sweet potatoes, purple carrots, carrots, apples, white grapes, açai, blueberries, limes.
Naked Juice is something I discovered at my local convenience store.  I was fighting a cold I just could not get on top of and found their Green Machine juice.  It promised a boost of vitamins, minerals, and all natural goodness.  They got me hook, line, and sinker...but I was beyond pleasantly surprised!  Many people would be put off by the color and the look of the texture of the juice.  My first sip was extremely apprehensive, but I ended up loving it!  The fruit juice is the texture of a smoothie!  They proudly boast how fresh their product is on their label, and proceed to tell you exactly how much fruit is in each bottle (i.e. 2 3/4 apples, 1/2 banana, 1/3 mango, 1/3 kiwi, and a hint of pineapple juice).  I was even more surprised when I read the ingredient list...brace yourselves!  Blue Green Algae, Garlic, Broccoli, Parsley, Wheat Grass, Ginger, Barley Grass, etc.  Yet, all I could taste was the fruit.  I just was not a fan of the protein varieties...very grainy and full of soy and whey...definitely an acquired taste!  All of the juices have no preservatives, added sugar, artificial flavors, or artificial colors. 

Here is a break down of the most easy to find flavors and their ingredients:
Green Machine: apple and pear juice blend, pineapple juice, mango puree, kiwifruit puree, banana puree with powdered spirulina, chlorella, brocolli, green tea extract, spinach, barley grass, wheat grass, blue green algae, echinacea purpurea extract, odorless garlic
Red Machine: apple and pear juice blend, red raspberry puree, banana puree, pear puree, grain flax seed, cranberry juice concentrate, natural strawberry flavor, natural cranberry flavor, dried dulse powder, red grape concentrate, vitamin B12, folic acid, vitamin B6
Blue Machine: apple and pear juice blend, banana puree, pineapple juice, blueberry puree, soluble dietary fiber, blackberry puree, coconut, vitamin C (ascorbic acid), vitamin E (dl-Alpha Tocopheryl acetate), niacinamide, calcium pantothenate, vitamin B6 (pyridoxine hydrochloride), vitamin B12 (cyanocobalamine), folic acid

The rest of the flavors are:
Berry Blast, Mighty Mango, Power C Machine, Tropical Smoothie, Acai Machine, Berry Veggie Machine, Orange Carrot, Chai Spiced Cider, and O-J.

Similar to the Odawalla's Naked Juice Line are the Bolthouse Farms line.  They produce several lines of beverages.  I stick to the smoothie line, and find that it is just like the Naked Juice.  Bolthouse does add a little extra (preservatives, etc) to their juices, but they usually run a few dollars cheaper than the Naked Juices! 

The smoothie line flavors are:
Strawberry Banana, C-Boost (Orange Mango), Berry Boost, Blue Goodness, Amazing Mango, and Green Goodness.
The juice line flavors are:
Carrot, 50/50 Passion (Fruit and Veggie Blend), 50/50 Berry (Fruit and Veggie), Passion Orange Guava, Pomegranate, and Pear Merlot.
The protein line flavors are:
Chocolate, Mango, Vanilla Chai, Hazelnut Latte, Mocha Cappuccino, and Vanilla Latte.
The Bom Dia flavors are:
Açaí Original, Blueberry, Pomegranate, and Mangosteen.

Most of these juices can be found at your grocery store, Walmart, Target, or convenience stores!  You will need to look for the Bolthouse and Naked Juices in the refrigerated area (usually near the produce).  The fact that they have to be refrigerated and expire quickly, makes me remember that 1.) I need to go through them (aka force myself to drink them...which isn't hard to do at all lol), and 2.) they are really fresh juices!  I will sometimes even have these juices as breakfast if I am in a rush, or as a snack.  They are filling, and chock full-o-vitamins and minerals!
Related Posts Plugin for WordPress, Blogger...