I told you I am in love with grilled pizza!
I just cannot get enough of the crispy and slightly charred crust!
Ranch BLT Grilled Pizza
Yields 3 personal sized pizzas
Ingredients
Crust
This recipe is an adaptation of the Kitchen Aid Crispy Pizza Crust recipe. If you do not want to make your own crust, you could use a pre-made plain crust from your local grocery store, or you can buy pre-made pizza dough in a bag, which is usually found near the deli counter at the grocery store! Pillsbury also has great crusts which can be found near their biscuits and rolls in the refrigerated section of the grocery store!
1 cup water heated between 110 and 115 degrees Fahrenheit
2 1/4 tsp yeast
1/2 tsp salt
2 tsp olive oil
2 1/2 - 3 1/2 cups flour
Toppings
15 slices pre-cooked bacon, chopped
3 chicken cutlets
1 large tomato, chopped,
6 tbsp ranch dressing
2 cups chopped romaine
You will also need aluminum foil for the grill!
To Prepare the Crust
1. Heat the water between 110 and 115 degrees.
2. Pour the yeast and water in a bowl or mixer, and gently mix them together.
3. Add the salt and olive oil to the bowl and gently mix.
4. Add the flour, starting with 2 1/2 cups, and adding no more flour than 3 1/2 cups total. The dough should stick together in a ball and still be slightly sticky when there is just enough flour added!
5. Coat a bowl with olive oil and place the dough ball in the bowl, turning it until the entire dough ball is coated with a thin layer of oil.
6. Cover the bowl with saran wrap and place it in a warm place that is free of drafts.
7. Let the dough set for an hour, or until it has doubled in size.
To Prepare the Pizza
1. Prepare your grill by either turning it to a high setting, or getting the coals nice and hot.
2. While your grill is heating, cut three pieces of aluminum foil that are each approximately 1 foot long, and split your pizza dough into 3 equal parts, with each piece of dough going onto a piece of foil. To keep your pizza from sticking to the foil after cooking, sprinkle some corn meal on the foil!
3. Throw your chicken on the grill and cook it until it is almost cooked all of the way through. Keep in mind that it will be going back on the grill, and you will not want it to dry out! When it is done cooking, cut it into strips or cubes.
4. Spread the dough into a circle by pressing from the inside of the dough ball out with the palm of your hand.
5. When you are happy with the size and thickness of your crust, spread 2 tbsp of ranch on each crust and then pile on the toppings of your choosing - EXCEPT for the lettuce.
5. Turn down your grill to a low setting, or take the lid off for a few minutes.
6. Carry each of your pizzas to the grill by carrying it from opposite corners of the foil, and gently place it down on the grill.
7. Once all of your pizzas are on the grill, cover them and let them cook for approximately 10 minutes, or until the bottom of the crust is firm and brown, and the top is firm and cooked through. The foil will stick just a little bit, so be sure you get all of it off before enjoying your meal! A little corn meal on the bottom of the crust will greatly help prevent this!
8. When your pizza comes off the grill, top it with a handful of romaine!
Showing posts with label Tomato. Show all posts
Wednesday, August 24, 2011
Sunday, July 31, 2011
Grilled Beer and Steak Pizzas
Nothin' like some steak and beer...hot off the grill!
I've been reading about the wonder that is grilled pizza for some time now in magazines and on the internet, and just couldn't wrap my head around the concept and how it would taste. Today I bit the bullet, and fell in love!
I stewed over several kinds of pizza ideas and was leaning towards a steak direction. I didn't want to go the route of Philly Cheesesteak - living near Philly I find it is something I can almost get sick of. I started to think of other foods that are commonly seen paired with steak - potatoes, corn, salad...
Then it hit me - I had Sam Adams Cream Stout sitting in my fridge! Beer and Steak - there are not many more perfect combinations I can think of!
We DEVOURED these, and could not get enough! The crusts on these are like nothing I have had before! Because of the fire on the grill, they get slightly charred and so crispy, yet the top of the crust is chewy. I see many more of these in my immediate future!
You will need a knife for this pizza - consider yourselves warned!
Grilled Beer and Steak Pizza
Yields 3 personal sized pizzas
Ingredients
Crust
This recipe is an adaptation of the Kitchen Aid Crispy Pizza Crust recipe. If you do not want to make your own crust, you could use a pre-made plain crust from your local grocery store, or you can buy pre-made pizza dough in a bag, which is usually found near the deli counter at the grocery store! Pillsbury also makes a great rolled dough which is available in the refrigerated area of the grocery store near the biscuits and rolls!
1 cup stout beer heated between 110 and 115 degrees Fahrenheit
2 1/4 tsp yeast
1/2 tsp salt
2 tsp olive oil
2 1/2 - 3 1/2 cups flour
Toppings
1/2 pound thinly sliced roast beef, chopped
1/4 pound sliced gouda, chopped
1 small red onion, cut into rings or half moons
1 medium green bell pepper, cut into thin strips
1 medium tomato, diced
2 cups romaine lettuce, chopped
You will also need aluminum foil for the grill!
To Prepare the Crust
1. Heat the beer between 110 and 115 degrees.
2. Pour the yeast and beer in a bowl or mixer, and gently mix them together.
3. Add the salt and olive oil to the bowl and gently mix.
4. Add the flour, starting with 2 1/2 cups, and adding no more flour than 3 1/2 cups total. Add the flour until the dough sticks together in a ball and is slightly sticky!
5. Coat a bowl with olive oil and place the dough ball in the bowl, turning it until the entire dough ball is coated with a thin layer of oil.
6. Cover the bowl with saran wrap and place it in a warm place that is free of drafts.
7. Let the dough set for an hour, or until it has doubled in size.
8. When you are ready to work the dough, be sure to punch it down!
To Prepare the Pizza
1. Prepare your grill by either turning it to a high setting, or getting the coals nice and hot.
2. While your grill is heating, cut three pieces of aluminum foil that are each approximately 1 foot long, and split your pizza dough into 3 equal parts, with each piece of dough going onto a piece of foil. To keep your pizza from sticking to the foil after cooking, sprinkle some corn meal on the foil!
3. Spread the dough into a circle by pressing from the inside of the dough ball out with the palm of your hand.
4. When you are happy with the size and thickness of your crust, pile on the toppings of your choosing - EXCEPT for the lettuce.
5. Turn down your grill to a low setting, or take the lid off for a few minutes.
6. Carry each of your pizzas to the grill by carrying it from opposite corners of the foil, and gently place it down on the grill.
7. Once all of your pizzas are on the grill, cover them and let them cook for approximately 10 minutes, or until the bottom of the crust is firm and brown, and the top is firm and cooked through. The foil will stick just a little bit, so be sure you get all of it off before enjoying your meal! A little corn meal on the bottom of the crust will greatly help prevent this!
8. When your pizza comes off the grill, top it with a handful of romaine!
I've been reading about the wonder that is grilled pizza for some time now in magazines and on the internet, and just couldn't wrap my head around the concept and how it would taste. Today I bit the bullet, and fell in love!
I stewed over several kinds of pizza ideas and was leaning towards a steak direction. I didn't want to go the route of Philly Cheesesteak - living near Philly I find it is something I can almost get sick of. I started to think of other foods that are commonly seen paired with steak - potatoes, corn, salad...
Then it hit me - I had Sam Adams Cream Stout sitting in my fridge! Beer and Steak - there are not many more perfect combinations I can think of!
We DEVOURED these, and could not get enough! The crusts on these are like nothing I have had before! Because of the fire on the grill, they get slightly charred and so crispy, yet the top of the crust is chewy. I see many more of these in my immediate future!
You will need a knife for this pizza - consider yourselves warned!
Grilled Beer and Steak Pizza
Yields 3 personal sized pizzas
Ingredients
Crust
This recipe is an adaptation of the Kitchen Aid Crispy Pizza Crust recipe. If you do not want to make your own crust, you could use a pre-made plain crust from your local grocery store, or you can buy pre-made pizza dough in a bag, which is usually found near the deli counter at the grocery store! Pillsbury also makes a great rolled dough which is available in the refrigerated area of the grocery store near the biscuits and rolls!
1 cup stout beer heated between 110 and 115 degrees Fahrenheit
2 1/4 tsp yeast
1/2 tsp salt
2 tsp olive oil
2 1/2 - 3 1/2 cups flour
Toppings
1/2 pound thinly sliced roast beef, chopped
1/4 pound sliced gouda, chopped
1 small red onion, cut into rings or half moons
1 medium green bell pepper, cut into thin strips
1 medium tomato, diced
2 cups romaine lettuce, chopped
You will also need aluminum foil for the grill!
To Prepare the Crust
1. Heat the beer between 110 and 115 degrees.
2. Pour the yeast and beer in a bowl or mixer, and gently mix them together.
3. Add the salt and olive oil to the bowl and gently mix.
4. Add the flour, starting with 2 1/2 cups, and adding no more flour than 3 1/2 cups total. Add the flour until the dough sticks together in a ball and is slightly sticky!
5. Coat a bowl with olive oil and place the dough ball in the bowl, turning it until the entire dough ball is coated with a thin layer of oil.
6. Cover the bowl with saran wrap and place it in a warm place that is free of drafts.
7. Let the dough set for an hour, or until it has doubled in size.
8. When you are ready to work the dough, be sure to punch it down!
To Prepare the Pizza
1. Prepare your grill by either turning it to a high setting, or getting the coals nice and hot.
2. While your grill is heating, cut three pieces of aluminum foil that are each approximately 1 foot long, and split your pizza dough into 3 equal parts, with each piece of dough going onto a piece of foil. To keep your pizza from sticking to the foil after cooking, sprinkle some corn meal on the foil!
3. Spread the dough into a circle by pressing from the inside of the dough ball out with the palm of your hand.
4. When you are happy with the size and thickness of your crust, pile on the toppings of your choosing - EXCEPT for the lettuce.
5. Turn down your grill to a low setting, or take the lid off for a few minutes.
6. Carry each of your pizzas to the grill by carrying it from opposite corners of the foil, and gently place it down on the grill.
7. Once all of your pizzas are on the grill, cover them and let them cook for approximately 10 minutes, or until the bottom of the crust is firm and brown, and the top is firm and cooked through. The foil will stick just a little bit, so be sure you get all of it off before enjoying your meal! A little corn meal on the bottom of the crust will greatly help prevent this!
8. When your pizza comes off the grill, top it with a handful of romaine!
Tuesday, February 8, 2011
Vegetarian Stew
Last night my grandmom had our family over for dinner. We had a DELICIOUS enchilada casserole, and will be posting that recipe soon! That being said, Meatless Monday had to be put off until tonight! This week, for Meatless Monday, I made a vegetarian stew. With my favorite produce store going out of business, I was forced to buy frozen vegetables. When I am put in a bind like this, I always opt for frozen over canned. Frozen veggies are a smidgen better for you and retain a good portion of their nutritional value! If you are using frozen veggies for this recipe, be sure they are defrosted, and if you are using canned veggies, be sure to strain the excess liquid off of them before adding them to the pot!
Vegetarian Stew
Yields 6 generous servings
Ingredients
1 small onion, peeled and diced
2 large potatoes, washed and cubed
1 carrot, washed and diced
8 ounces corn kernels
8 ounces green beans
8 ounces peas
28 ounces pureed tomatoes
3 cans water
8 ounces of whole wheat pasta (I used fusilli)
Salt
Pepper
Paprika
To Prepare the Stew
1. In a large stew pot, add the onions, carrots, and potatoes. Heat them over medium heat while constantly stirring.
2. When the onions have started to become translucent, add the corn, green beans, and peas.
3. Stir everything together well.
4. Add the pureed tomatoes and 2 cans of water.
5. Cook over medium heat.
6. When the liquid comes to a boil, season with the salt, pepper, and paprika to taste.
7. Add the pasta.
8. Add the last can of water as needed to make the stew as thick or runny as you prefer it to be.
9. When the pasta has cooked through and the potatoes are soft, your stew is ready!
Vegetarian Stew
Yields 6 generous servings
Ingredients
1 small onion, peeled and diced
2 large potatoes, washed and cubed
1 carrot, washed and diced
8 ounces corn kernels
8 ounces green beans
8 ounces peas
28 ounces pureed tomatoes
3 cans water
8 ounces of whole wheat pasta (I used fusilli)
Salt
Pepper
Paprika
To Prepare the Stew
1. In a large stew pot, add the onions, carrots, and potatoes. Heat them over medium heat while constantly stirring.
2. When the onions have started to become translucent, add the corn, green beans, and peas.
3. Stir everything together well.
4. Add the pureed tomatoes and 2 cans of water.
5. Cook over medium heat.
6. When the liquid comes to a boil, season with the salt, pepper, and paprika to taste.
7. Add the pasta.
8. Add the last can of water as needed to make the stew as thick or runny as you prefer it to be.
9. When the pasta has cooked through and the potatoes are soft, your stew is ready!
Labels:
Carrots,
Corn,
Green Bean,
Meatless Monday,
Onion,
Pasta,
Peas,
Potatoes,
Sauce,
Tomato,
Vegetables,
Vegetarian
Saturday, January 15, 2011
Poop Soup
On Wednesday, after our "huge" snow storm, I was craving soup! It was as if I knew what was coming when I was at the grocery store the Sunday before and picked up a bag of dried, mixed beans! When I was a little girl, my mom used to make a red soup called Poop Soup, which is more commonly refer to as Navy Bean Soup. It used to be a treat we would only indulge in a few times a year, but we all looked forward to it with our mouths drooling. The two day process was torture!
When I came across the dry bean mix in the grocery store, I realized that it had been years since we had it, and I could not resist the temptation. When snow arrived on the weather forecast, it was destiny! I just want to mention, that if you do not want to go through the process of soaking beans, you can always mix wet canned beans that have been drained instead. This will also cut your process down from 2 days to 1! I have also included the recipe for my great grandmom's dumpling recipe, which I make with this.
Poop Soup
Yields 10 large servings...aka enough to feed the entire state of Rhode Island. There is enough with this amount of ingredients to reserve half and freeze it for another day!
Ingredients
1 lb 13 oz bag of dried bean mix (Again, you can replace this with canned beans that have been strained for a shorter prep time!)
56 oz of tomato puree
1 pound of diced ham (You can replace this with a pork butt or kielbasa. Normally we do use a pork butt.)
Salt and Pepper to taste
To Prepare the Soup
1. The night before you make the soup, place your dried beans in a strainer and wash them with cool water.
2. Place them in a large bowl with plenty of water and leave them to soak over night. Even though you have washed the beans, the water will still turn colors because of the beans reconstituting.
3. The next day strain the water from the beans and start boiling them in 2 quarts of water. Make sure there is enough water to cover the beans plus some!
4. Boil the beans for at least 1 hour.
5. Chop the ham and add it to the pot of water and beans. If you are using a pork butt, I would recommend leaving it whole and adding it to the pot!
6. Right after adding the ham, add 56 ounces of tomato puree to the pan and turn it down to low heat.
7. Cook for another hour on low heat. You can salt and pepper to taste during this step, or let everyone season their own bowls!
Approximately a half hour before serving, prepare your dumplings!
Great Grandma's Dumplings
Yields approximately 2 cups of dumplings
Ingredients
2 cups flour
1 cup milk
1 tsp salt
3 tsp baking powder
To Prepare the Dumplings
1. Turn the soup up to medium heat so it is simmering and on the verge of boiling.
2. Blend all of the dry ingredients together.
3. Add the milk and gently fluff the batter together with a fork. The dough should not completely come together. If you force the ingredients, your dough will not rise properly in the soup!
4. Drop the dough into the soup by the spoon full.
5. Cover the pot with a lid and forget about it for about 20 minutes or until the dumplings have risen and puffed up!
When I came across the dry bean mix in the grocery store, I realized that it had been years since we had it, and I could not resist the temptation. When snow arrived on the weather forecast, it was destiny! I just want to mention, that if you do not want to go through the process of soaking beans, you can always mix wet canned beans that have been drained instead. This will also cut your process down from 2 days to 1! I have also included the recipe for my great grandmom's dumpling recipe, which I make with this.
Poop Soup
Yields 10 large servings...aka enough to feed the entire state of Rhode Island. There is enough with this amount of ingredients to reserve half and freeze it for another day!
Ingredients
1 lb 13 oz bag of dried bean mix (Again, you can replace this with canned beans that have been strained for a shorter prep time!)
56 oz of tomato puree
1 pound of diced ham (You can replace this with a pork butt or kielbasa. Normally we do use a pork butt.)
Salt and Pepper to taste
To Prepare the Soup
1. The night before you make the soup, place your dried beans in a strainer and wash them with cool water.
2. Place them in a large bowl with plenty of water and leave them to soak over night. Even though you have washed the beans, the water will still turn colors because of the beans reconstituting.
3. The next day strain the water from the beans and start boiling them in 2 quarts of water. Make sure there is enough water to cover the beans plus some!
| The reconstituted beans will be slightly plump and a little softer. |
5. Chop the ham and add it to the pot of water and beans. If you are using a pork butt, I would recommend leaving it whole and adding it to the pot!
6. Right after adding the ham, add 56 ounces of tomato puree to the pan and turn it down to low heat.
7. Cook for another hour on low heat. You can salt and pepper to taste during this step, or let everyone season their own bowls!
Approximately a half hour before serving, prepare your dumplings!
Great Grandma's Dumplings
Yields approximately 2 cups of dumplings
Ingredients
2 cups flour
1 cup milk
1 tsp salt
3 tsp baking powder
To Prepare the Dumplings
1. Turn the soup up to medium heat so it is simmering and on the verge of boiling.
2. Blend all of the dry ingredients together.
3. Add the milk and gently fluff the batter together with a fork. The dough should not completely come together. If you force the ingredients, your dough will not rise properly in the soup!
4. Drop the dough into the soup by the spoon full.
5. Cover the pot with a lid and forget about it for about 20 minutes or until the dumplings have risen and puffed up!
Monday, January 10, 2011
Meatless Monday - Havarti and Kale Grilled on Seeded Rye with Tomato Soup
I should have known better than to venture into the kitchen while I was under the weather. Dinner was good, but definitely NOT incident free...
Every now and then throughout the year I go on a new recipe binge. I try out a bunch of new things, and then adapt them to my style and my family's tastes! It looks like the binge came early this year.
Rachel Ray got me again with the pictures of her Grilled Cheese and Kale Sandwiches with Tomato Soup. It looked beyond yummy, and seemed like a good dinner for Meatless Monday. With a storm a-brewin' to the west of us, and the temperatures steadily dropping, it seemed like the perfect combo! Not to mention, I hoped that it would help my stuffed up nose along!
It seemed easy enough...
I forgot to pick up the havarti and bread at the grocery store when I did my shopping...greaaaat.
So today, on the way home from work, my dad and I stopped at the grocery store. Not thinking, I had worn slippers in the car and couldn't go in the store, so I sent my dad in with a list and told him, "If they don't have havarti at the deli counter, get provolone." What seemed like 40 minutes later he emerges...with havarti...in block form. Crap. Ok, so I will just slice it up when I get home...no biggie. As I drive, I suddenly remember that someone, who shall remain nameless, ran my wooden cheese slicer through the dishwasher and cracked it beyond repair. Hand slicing soft cheese...this is going to make for an interesting night! At least he did me proud and picked up a real loaf of seeded rye in the bakery...bonus points for dad!
We get home and I get the havarti sliced in a decent amount of time, assemble 3 sandwiches, and start melting a pad of butter in the frying pan on medium heat. Two sandwiches went in easily, and I dipped my kitchen brush in the melted butter and saturated the tops of both sandwiches. I reached for my tried and true Campbell's Condensed and the milk and got the tomato soup going while they cooked. After about 5 minutes on low to medium heat, the bottom layer of havarti had melted most of the way, so I flipped and pressed the sandwiches down with a spatula to help everything bind together. My dad and sister's sandwiches came out of the pan and were the definition of perfection when I cut them in half and set them on a plate next to a heaping bowl of steamy tomato soup!
Then it quickly went downhill as I put my sandwich in the pan. I threw another pad of butter in the pan forgetting that the heat was a little high. It browned quickly and I though, "No biggie, I'll toss it in anyway'" Yeah...not my best idea. I thought it was ok, and dipped my brush in the butter to take care of the top piece of bread. The brush MELTED IN THE BUTTER!
I scooped my spatula under the sandwich and started yelling for help. My sister sauntered into the kitchen wanting to know what my problem was. She got me a smaller frying pan for me and dropped a pad of butter in it. I figured my sandwich was ready to flip and flipped it over into the new pan. I burnt the bottom of my sandwich and the cheese didn't melt all of the way. I managed to get it to melt most of the way and finally was able to enjoy my dinner!
After all was said and done, the grilled cheese was worth it and everybody loved it, but I guess I would have liked it more if mine had been a little less...cajun style?
Havarti and Kale Grilled on Seeded Rye
Source: Every Day with Rachel Ray - February 2011
Yields approximately 5 sandwiches
Ingredients
1 pound of havarti cheese
1 pound of kale
1 loaf of seeded rye bread
a few tablespoons of butter
To Prepare
1. Melt a tablespoon of butter in a frying pan over low to medium heat.
2. Spread a layer of havarti on both sides of the bread.
3. Place a layer of deveined kale leaves on one side of the sandwich and close the sandwich.
4. Cook the sandwich in the melted butter over low to medium heat. For the optimal golden brown buttery sandwich, spread some melted butter on the top side of the sandwich while it cooks! When you flip it there will be some butter to brown and bubble!
5. After you flip it, press it down with a spatula so everything starts to melt together.
6. Pull the sandwich out of the pan when the cheese has melted!
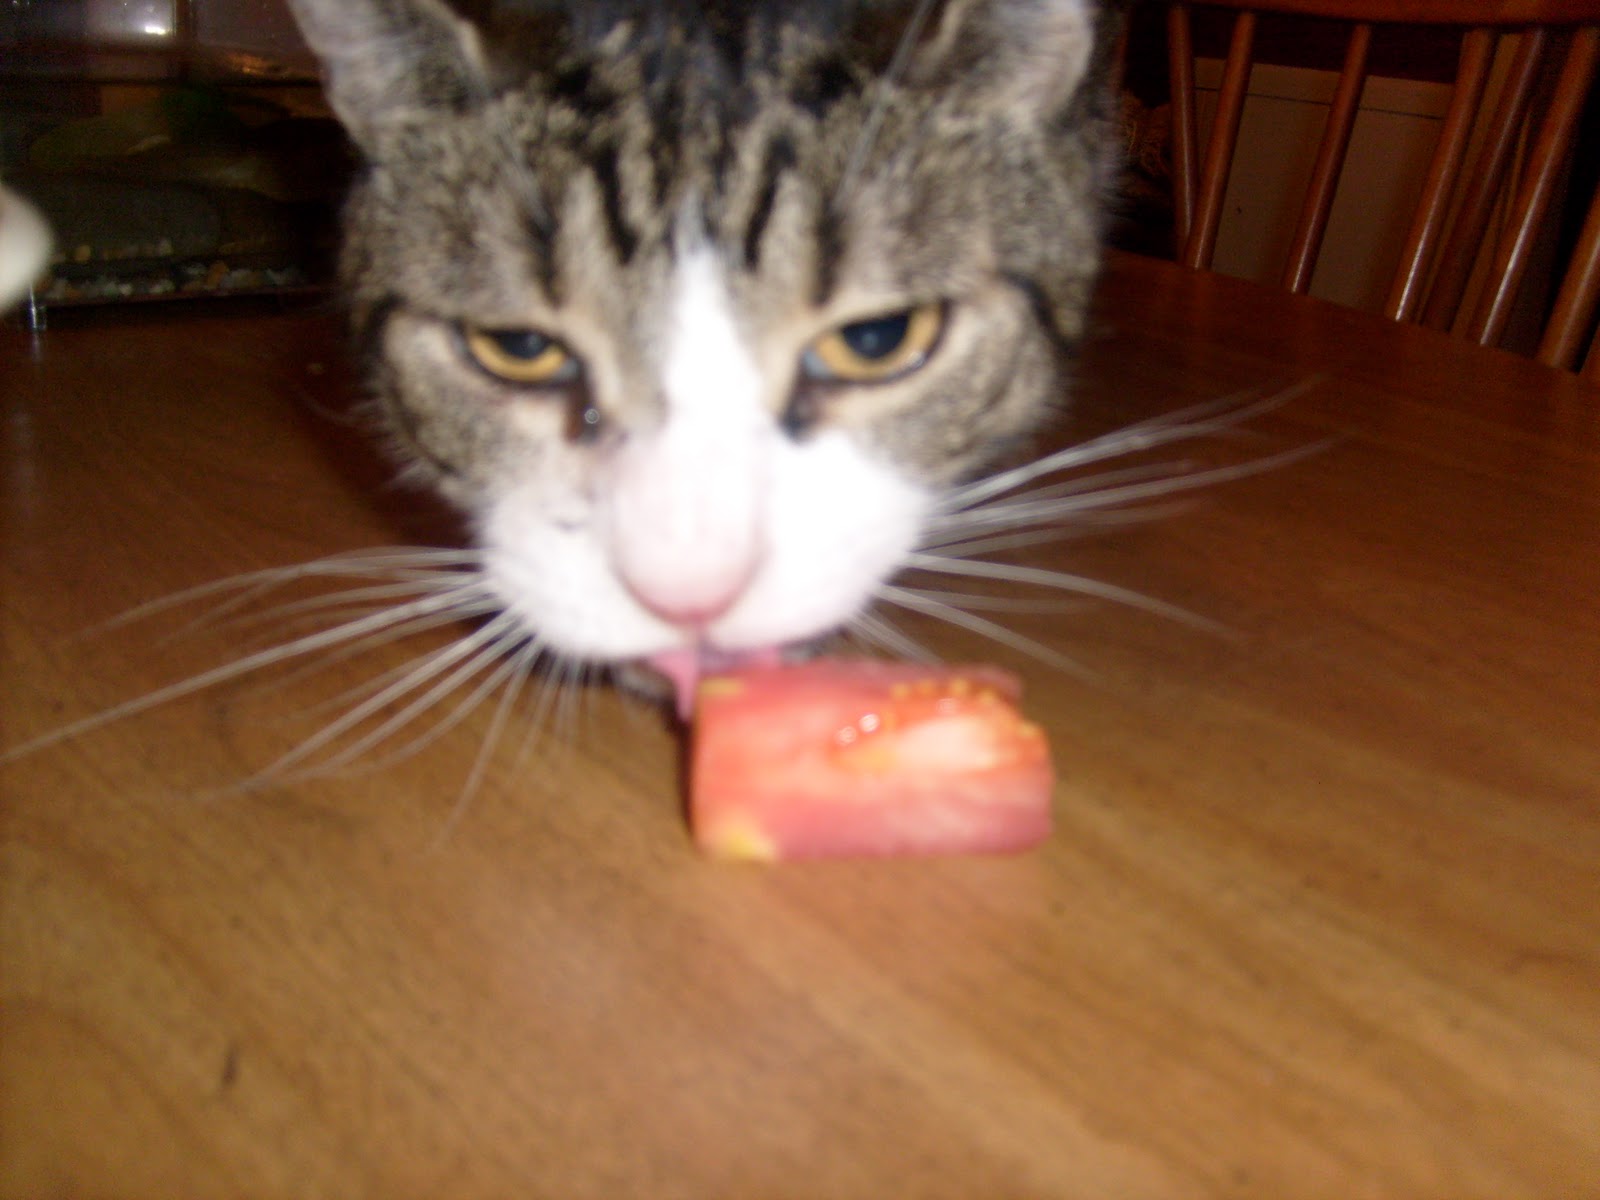
On a fun little side note, I have to show how absolutely adorable my cat Vinnie is! He LOVES tomatoes, so any time we have fresh tomatoes or tomato soup, he puts on his "I don't want it face," and starts purring so loud that it sounds like a semi is coming through the house. Tonight he was eating the spoon full of left over tomato soup off a spoon. He has manners, what can I say? Here are a few photos of him with a slice of tomato...
Every now and then throughout the year I go on a new recipe binge. I try out a bunch of new things, and then adapt them to my style and my family's tastes! It looks like the binge came early this year.
Rachel Ray got me again with the pictures of her Grilled Cheese and Kale Sandwiches with Tomato Soup. It looked beyond yummy, and seemed like a good dinner for Meatless Monday. With a storm a-brewin' to the west of us, and the temperatures steadily dropping, it seemed like the perfect combo! Not to mention, I hoped that it would help my stuffed up nose along!
It seemed easy enough...
I forgot to pick up the havarti and bread at the grocery store when I did my shopping...greaaaat.
So today, on the way home from work, my dad and I stopped at the grocery store. Not thinking, I had worn slippers in the car and couldn't go in the store, so I sent my dad in with a list and told him, "If they don't have havarti at the deli counter, get provolone." What seemed like 40 minutes later he emerges...with havarti...in block form. Crap. Ok, so I will just slice it up when I get home...no biggie. As I drive, I suddenly remember that someone, who shall remain nameless, ran my wooden cheese slicer through the dishwasher and cracked it beyond repair. Hand slicing soft cheese...this is going to make for an interesting night! At least he did me proud and picked up a real loaf of seeded rye in the bakery...bonus points for dad!
We get home and I get the havarti sliced in a decent amount of time, assemble 3 sandwiches, and start melting a pad of butter in the frying pan on medium heat. Two sandwiches went in easily, and I dipped my kitchen brush in the melted butter and saturated the tops of both sandwiches. I reached for my tried and true Campbell's Condensed and the milk and got the tomato soup going while they cooked. After about 5 minutes on low to medium heat, the bottom layer of havarti had melted most of the way, so I flipped and pressed the sandwiches down with a spatula to help everything bind together. My dad and sister's sandwiches came out of the pan and were the definition of perfection when I cut them in half and set them on a plate next to a heaping bowl of steamy tomato soup!
Then it quickly went downhill as I put my sandwich in the pan. I threw another pad of butter in the pan forgetting that the heat was a little high. It browned quickly and I though, "No biggie, I'll toss it in anyway'" Yeah...not my best idea. I thought it was ok, and dipped my brush in the butter to take care of the top piece of bread. The brush MELTED IN THE BUTTER!
| The burnt brush aftermath! |
After all was said and done, the grilled cheese was worth it and everybody loved it, but I guess I would have liked it more if mine had been a little less...cajun style?
Havarti and Kale Grilled on Seeded Rye
Source: Every Day with Rachel Ray - February 2011
Yields approximately 5 sandwiches
Ingredients
1 pound of havarti cheese
1 pound of kale
1 loaf of seeded rye bread
a few tablespoons of butter
To Prepare
1. Melt a tablespoon of butter in a frying pan over low to medium heat.
2. Spread a layer of havarti on both sides of the bread.
3. Place a layer of deveined kale leaves on one side of the sandwich and close the sandwich.
4. Cook the sandwich in the melted butter over low to medium heat. For the optimal golden brown buttery sandwich, spread some melted butter on the top side of the sandwich while it cooks! When you flip it there will be some butter to brown and bubble!
5. After you flip it, press it down with a spatula so everything starts to melt together.
6. Pull the sandwich out of the pan when the cheese has melted!
| It didn't quite melt all the way because I was afraid of burning it more! It was still delicious though!! |
Thursday, January 6, 2011
Pizza Pizza!
Last night was homemade pizza night! My Grandma Nancy has been making pizza at her house for at least 15 years. Whenever we would make the ride out to Pennsylvania we would beg for her to make "Grandma Pizza"...it would only be a 5 hour drive to pick up our pizza order hehe! She loads a fluffy crust with, in this order: sauce, parmesan, pepperoni, sausage, olives, and two kinds of shredded cheese. It bakes and bakes and bakes, and when it finally comes out of the oven is bubbling, golden brown, and smells something beyond delicious!
When I asked my brother what he wanted for dinner this week, since he goes back to dining hall food this weekend, he said, "Grandma Pizza!" I wanted to go Grandma's route, but couldn't afford the list of ingredients with the food budget, so I decided to go with a Barbecue Chicken Pizza and a Rustic Vegetable Pizza.
I made a crust from scratch with a recipe from my Kitchen Aid book, which I am now referring to as the Holy Grail. I doubled this recipe to make 2 pizzas!
Crusty Pizza Dough
Yields dough for 1 large pizza
Source: Recipes For Your Kitchen Aid Stand Mixer
Ingredients
1 package active dry yeast (2 1/4 teaspoons)
1 cup warm water (105 degrees to 115 degrees)
1/2 teaspoon salt
2 teaspoons olive oil
2 1/2 to 3 1/2 cups all-purpose flour
1 tablespoon cornmeal
Dissolve yeast in warm water in warmed mixer bowl. Add salt, olive oil, and 2 1/2 cups flour. Attach bowl and dough hook to mixer. Turn to Speed 2 and mix about 1 minute.
Continuing on Speed 2, add remaining flour 1/2 cup at a time, and mix until dough clings to hook and cleans sides of bowl, about 2 minutes. Knead on Speed 2 about 2 minutes longer.
Place dough in greased bowl, turning to grease top. Cover. Let rise in warm place, free from draft, about 1 hour, or until doubled in bulk. Punch dough down.
Brush 14-inch pizza pan with oil. Sprinkle with cornmeal. Press dough across bottom of pan, forming a collar around edge to hold toppings. Add toppings as desired. Bake at 450 degrees for 15 to 20 minutes.
I stuck fairly close to the recipe since I am still pretty new to the world of raised doughs, but I did make a few small changes because of what was available to me in my kitchen pantry. I was out of olive oil, so I replaced it with white truffle oil, which just added to the flavor of the crust. It did not changed the dough physically. The only other change I made was the pan I used. A pizza pan is not something I have added to my cooking arsenal yet, so I split the dough in two balls (remember...I made a double batch!) and spread it across to large baking sheets!
And for the toppings...
On the chicken pizza, I poured a 18 ounce jar of BBQ sauce, 1 pound of chopped pan-seared chicken, and 2 cups of shredded white cheddar.
On the veggie pizza, I placed a handful of spinach leaves, sundried tomatoes, sliced black olives, shitake mushrooms, and a heavy sprinkling of parmesan cheese.
The results are in...
The Barbecue Chicken Pizza was a HUGE hit! The Veggie Pizza, on the other hand, was good but missing something...I think it is called moisture! Oops! I really should have put some red sauce down on it, or opted for a shredded cheese that would have added some moisture while it cooked. You cook, you learn...I'll have better luck next time hehe!
When I asked my brother what he wanted for dinner this week, since he goes back to dining hall food this weekend, he said, "Grandma Pizza!" I wanted to go Grandma's route, but couldn't afford the list of ingredients with the food budget, so I decided to go with a Barbecue Chicken Pizza and a Rustic Vegetable Pizza.
I made a crust from scratch with a recipe from my Kitchen Aid book, which I am now referring to as the Holy Grail. I doubled this recipe to make 2 pizzas!
Crusty Pizza Dough
Yields dough for 1 large pizza
Source: Recipes For Your Kitchen Aid Stand Mixer
Ingredients
1 package active dry yeast (2 1/4 teaspoons)
1 cup warm water (105 degrees to 115 degrees)
1/2 teaspoon salt
2 teaspoons olive oil
2 1/2 to 3 1/2 cups all-purpose flour
1 tablespoon cornmeal
Dissolve yeast in warm water in warmed mixer bowl. Add salt, olive oil, and 2 1/2 cups flour. Attach bowl and dough hook to mixer. Turn to Speed 2 and mix about 1 minute.
Continuing on Speed 2, add remaining flour 1/2 cup at a time, and mix until dough clings to hook and cleans sides of bowl, about 2 minutes. Knead on Speed 2 about 2 minutes longer.
Place dough in greased bowl, turning to grease top. Cover. Let rise in warm place, free from draft, about 1 hour, or until doubled in bulk. Punch dough down.
Brush 14-inch pizza pan with oil. Sprinkle with cornmeal. Press dough across bottom of pan, forming a collar around edge to hold toppings. Add toppings as desired. Bake at 450 degrees for 15 to 20 minutes.
I stuck fairly close to the recipe since I am still pretty new to the world of raised doughs, but I did make a few small changes because of what was available to me in my kitchen pantry. I was out of olive oil, so I replaced it with white truffle oil, which just added to the flavor of the crust. It did not changed the dough physically. The only other change I made was the pan I used. A pizza pan is not something I have added to my cooking arsenal yet, so I split the dough in two balls (remember...I made a double batch!) and spread it across to large baking sheets!
And for the toppings...
On the chicken pizza, I poured a 18 ounce jar of BBQ sauce, 1 pound of chopped pan-seared chicken, and 2 cups of shredded white cheddar.
On the veggie pizza, I placed a handful of spinach leaves, sundried tomatoes, sliced black olives, shitake mushrooms, and a heavy sprinkling of parmesan cheese.
The results are in...
The Barbecue Chicken Pizza was a HUGE hit! The Veggie Pizza, on the other hand, was good but missing something...I think it is called moisture! Oops! I really should have put some red sauce down on it, or opted for a shredded cheese that would have added some moisture while it cooked. You cook, you learn...I'll have better luck next time hehe!
Tuesday, December 21, 2010
Balsamic Glazed Pasta Primavera
This dish brings back fond memories of the two months I managed to survive living in Brooklyn without a job or income! During the summer of 2007, my friend Alex and I decided we were moving to New York City. Luckily for him, he was able to transfer his job, but I was coming out of a contract at the college I was working at and was struggling with the NYC job market. We decided to stick to our guns with the hope that I would find work when we got there. No such luck!
In need of cheap meals so we could spend our money on more important things (like bar hoping and Broadway shows hehe), I started to get a little creative in the kitchen. There is nothing like a trip to a bodega or city grocery store to heighten one's creative and money saving senses! Vegetables were beyond cheap, and a box of pasta cost pennies! The apartment we were subletting came with a stocked kitchen that the owners told us was fair game while they were away. Fortunately for Alex and me, they were both artistic, and that seemed to translate in their kitchen. There were spices I had never even heard of before then, fresh garlic, wines, vinegars, and lots of basics like salt, flour, and pepper.
So, unto us, Balsamic Glazed Pasta Primavera was born! I know this is a somewhat loose interpretation of primavera, especially since it is sans any cream or cheese. It is, though, much lower in calories, and much cheaper to make! Dairy products rack up some serious cash at the register!
Balsamic Glazed Pasta Primavera
Yields 6 servings
To Prepare the Primavera
1. Pre-heat your oven to 350 degrees.
2. Place parchment paper on a baking sheet to cook your tomatoes. You will see in the picture below why a little parchment will go a long way. I used approximately 15 cherry tomatoes. Cut them in half and spread them out on the cookie sheet. Sprinkle them with some sea salt and put them in the oven to cook!
3. Put on a pot of salt water to boil, which will later be used to cook the pasta. I usually use a tablespoonish amount of salt.
4. In a large saute pan, heat 2 tablespoons of olive oil over low heat.
5. While your oil is heating, start breaking spinach leaves off of their stems right at the base of the leaf. You will need approximately 1 pound of spinach. This will look like a lot when you get it at the store, but it will cook down quite a bit!
6. Add your spinach to the saute pan and stir it occasionally while it continues to cook.
7. Cut approximately 1 pound of asparagus into 1 to 1 1/2 inch long pieces. Be sure to not use the very base of the asparagus. In most cases this will be trash, as it was exposed and has started to dry out a little during its trip to the grocery store and your fridge!
8. Add your asparagus to the saute pan.
9. Roughly chop 4 cloves of garlic and add it to the mixture.
10. Throw your pasta into the boiling water! I used 1 pound of whole wheat rotini.
11. Add 1 jar of drained artichoke hearts to the saute pan and give it a good stir!
12. In a small sauce pan, heat a 1/2 cup of balsamic vinegar and 2 tablespoons of sugar over medium heat. Be sure to stir this fairly often!
13. Continue to cook the vinegar and sugar until it seems like it is thickening just a bit. When it reaches that stage, pour it into the saute pan with the veggies and stir. Make sure everything gets coated well!
14. When your pasta is cooked, drain it and add it to the saute pan.
15. Pull your tomatoes out of the oven and add them directly to the saute pan, and stir everything together!
![]() |
| Alex and I circa December 2006 at Elmira College's Relay For Life! |
So, unto us, Balsamic Glazed Pasta Primavera was born! I know this is a somewhat loose interpretation of primavera, especially since it is sans any cream or cheese. It is, though, much lower in calories, and much cheaper to make! Dairy products rack up some serious cash at the register!
Balsamic Glazed Pasta Primavera
Yields 6 servings
To Prepare the Primavera
1. Pre-heat your oven to 350 degrees.
2. Place parchment paper on a baking sheet to cook your tomatoes. You will see in the picture below why a little parchment will go a long way. I used approximately 15 cherry tomatoes. Cut them in half and spread them out on the cookie sheet. Sprinkle them with some sea salt and put them in the oven to cook!
| I was out of parchment - and am now out a baking sheet. Sigh. |
4. In a large saute pan, heat 2 tablespoons of olive oil over low heat.
5. While your oil is heating, start breaking spinach leaves off of their stems right at the base of the leaf. You will need approximately 1 pound of spinach. This will look like a lot when you get it at the store, but it will cook down quite a bit!
6. Add your spinach to the saute pan and stir it occasionally while it continues to cook.
7. Cut approximately 1 pound of asparagus into 1 to 1 1/2 inch long pieces. Be sure to not use the very base of the asparagus. In most cases this will be trash, as it was exposed and has started to dry out a little during its trip to the grocery store and your fridge!
8. Add your asparagus to the saute pan.
9. Roughly chop 4 cloves of garlic and add it to the mixture.
10. Throw your pasta into the boiling water! I used 1 pound of whole wheat rotini.
11. Add 1 jar of drained artichoke hearts to the saute pan and give it a good stir!
12. In a small sauce pan, heat a 1/2 cup of balsamic vinegar and 2 tablespoons of sugar over medium heat. Be sure to stir this fairly often!
13. Continue to cook the vinegar and sugar until it seems like it is thickening just a bit. When it reaches that stage, pour it into the saute pan with the veggies and stir. Make sure everything gets coated well!
14. When your pasta is cooked, drain it and add it to the saute pan.
15. Pull your tomatoes out of the oven and add them directly to the saute pan, and stir everything together!
Tuesday, September 21, 2010
Taco Soup
I absolutely love tacos, but when fall and winter come I like to fill up on hearty and hot soup, not to mention the fact that lettuce and tomatoes start to become a little sketchy (and not as delicious)! Cold weather and a craving for tacos got me craving this last winter. What I especially love about this soup is how fast it cooks...only about 10 minutes! The longest part of the process is browning the meat! Now, I know most of you are probably cringing at the fact that this used to be a school cafeteria left overs dish, but this isn't your high school's taco soup!
Taco Soup
Yields 6 generous servings
To Prepare the Soup
1. Brown 1 pound of ground beef in a large pot. If you don't like beef, ground chicken or turkey works well too!
2. After the meat is browned, add a packet of either mild chili seasoning or taco meat seasoning. Cook this down for a few minutes!
3. Add 4 cans of condensed tomato soup, as well as 4 cans of water. Don't use milk with this recipe! The milk makes the soup too sweet in the end, while the water carries the other flavors better!
4. Blend in one can of refried beans. Make sure they are mixed in very well and not stuck to the bottom of the pan!
5. Bring the soup to a boil.
To Serve the Soup
I like to offer a few different toppings, but my favorites are crunched tortilla chips, taco blend cheese, and sour cream. I've also opted for black beans, corn, chives, olives, and onions!
Taco Soup
Yields 6 generous servings
To Prepare the Soup
1. Brown 1 pound of ground beef in a large pot. If you don't like beef, ground chicken or turkey works well too!
2. After the meat is browned, add a packet of either mild chili seasoning or taco meat seasoning. Cook this down for a few minutes!
3. Add 4 cans of condensed tomato soup, as well as 4 cans of water. Don't use milk with this recipe! The milk makes the soup too sweet in the end, while the water carries the other flavors better!
4. Blend in one can of refried beans. Make sure they are mixed in very well and not stuck to the bottom of the pan!
5. Bring the soup to a boil.
To Serve the Soup
I like to offer a few different toppings, but my favorites are crunched tortilla chips, taco blend cheese, and sour cream. I've also opted for black beans, corn, chives, olives, and onions!
Thursday, September 16, 2010
Ratatouille over Homemade Pasta
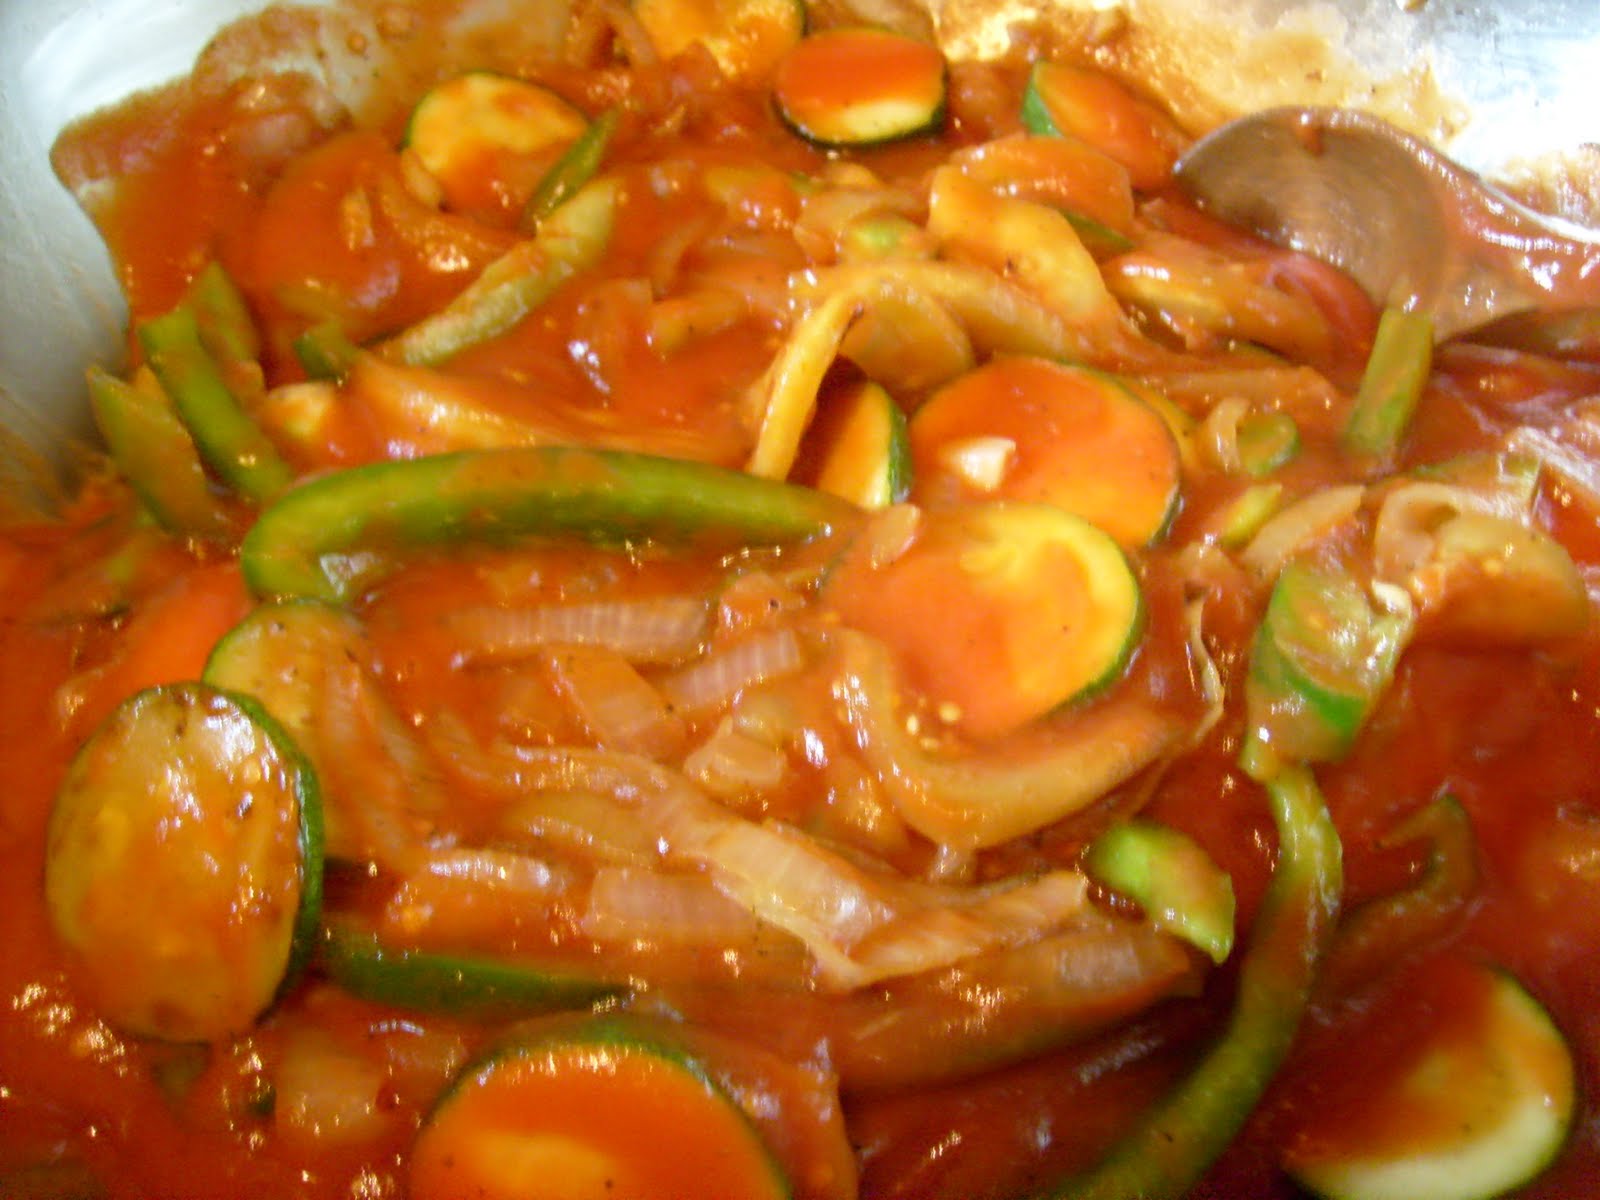
I don't mean the movie! Ratatouille is actually a vegetable stew that finds its roots in Nice,France! The full name of the dish is actually Ratatouille Nicoise (pronounced Knee-Swah). The traditional dish is comprised of eggplant, zucchini, bell pepper, onion, and tomato! Ratatouille is usually served on its own, but it can also be served over rice or pasta, with a side of bread for dipping, in a savory crepe, as a side dish, or even as an omelet filling! Some serving suggestions even say it can be served cold. Ratatouille is sorta like lasagna...it tastes better the next day after all of the flavors meld together...but I usually cannot wait until the next day and have to serve it immediately! It is filling (not loaded with calories), and great on a cold day (and very cheap to make)!
Ratatouille
Yields 5 servings
To Prepare the Ratatouille
1. Peel and large eggplant.
2. Cut the eggplant length wise and then into 1/4 inch thick half moons.
3. Cut a green bell pepper into strips.
4. Cut a zucchini into 1/4 inch thick rounds.
5. Peel an onion, cut it in half length wise, and then cut it into 1/4 inch thick half moons.
6. Heat 4 tablespoons of olive oil in a large pan over medium heat.
7. When the oil is hot, add the onions.
8. Cook the onions until they start to turn translucent and begin to brown around the edges.
9. While the onions are cooking, dice 5 cloves of onion. If you are going to dice them by hand, you will need to take their thick skins off of them. The easiest way to do this is to put a wide blade knife over top of the clove and pressing down on the blade with your fist. Do this carefully so you do not end up with bloody garlic and stitches! When you lift up the knife, the skins of the garlic will have started separating from the cloves, and can be easily peeled off in 1 or 2 pieces by hand. If you are going to use pre-diced garlic (usually found in the produce aisle or with the Italian products at your grocery store), use 2 tablespoons.
10. Once the onions are translucent, add the garlic to the pan, as well as 1 tablespoon of salt, and 1 tablespoon of black pepper.
11. After the above mixture cooks for about 5 minutes, add the zucchini, bell pepper, and zucchini.
12. Cook all of the ingredients down for another 5 minutes.
13. Add 28 ounces of tomato puree and stir well. Cover and cook over medium heat. Be sure to stir it often so it does not burn!
To Prepare the Pasta
*On a side note, if you do not own a pasta maker, you are probably better off going the route of boxed pasta. Unless you have a lot of experience making pasta, not using a pasta maker is a very long, drawn out, and difficult process!
1. Pour 3 cups of flour either onto a very clean surface or a bowl. If you are going to do this on a counter or other surface, you will need to shape the flour into a bowl shape.
2. Mix 3 eggs and 2 tablespoons of olive oil into the flour. You will need to mix it VERY well. Use your hands to mix it...your body heat will help the dough come together. You are going to need to put your whole body and a lot of force into making the dough.
3. Once the dough comes together, form it into a ball, coat it with some olive oil, wrap it in saran wrap, and set it aside for a little bit!
4. After 30 minutes, the dough will be ready!
5. From this point on, follow the suggested preparation directions of your pasta maker!
6. Set a large pot of water to boil. Once the water comes to a rapid boil, add your pasta. I was really thrown off the first time I made pasta because it actually starts to foam for a second when you put it in the water! This is normal...don't panic! The pasta will cook in literally just a minute or two. Serve homemade pasta immediately!
Ratatouille
Yields 5 servings
To Prepare the Ratatouille
1. Peel and large eggplant.
2. Cut the eggplant length wise and then into 1/4 inch thick half moons.
3. Cut a green bell pepper into strips.
4. Cut a zucchini into 1/4 inch thick rounds.
5. Peel an onion, cut it in half length wise, and then cut it into 1/4 inch thick half moons.
6. Heat 4 tablespoons of olive oil in a large pan over medium heat.
7. When the oil is hot, add the onions.
8. Cook the onions until they start to turn translucent and begin to brown around the edges.
9. While the onions are cooking, dice 5 cloves of onion. If you are going to dice them by hand, you will need to take their thick skins off of them. The easiest way to do this is to put a wide blade knife over top of the clove and pressing down on the blade with your fist. Do this carefully so you do not end up with bloody garlic and stitches! When you lift up the knife, the skins of the garlic will have started separating from the cloves, and can be easily peeled off in 1 or 2 pieces by hand. If you are going to use pre-diced garlic (usually found in the produce aisle or with the Italian products at your grocery store), use 2 tablespoons.
10. Once the onions are translucent, add the garlic to the pan, as well as 1 tablespoon of salt, and 1 tablespoon of black pepper.
11. After the above mixture cooks for about 5 minutes, add the zucchini, bell pepper, and zucchini.
12. Cook all of the ingredients down for another 5 minutes.
13. Add 28 ounces of tomato puree and stir well. Cover and cook over medium heat. Be sure to stir it often so it does not burn!
To Prepare the Pasta
*On a side note, if you do not own a pasta maker, you are probably better off going the route of boxed pasta. Unless you have a lot of experience making pasta, not using a pasta maker is a very long, drawn out, and difficult process!
1. Pour 3 cups of flour either onto a very clean surface or a bowl. If you are going to do this on a counter or other surface, you will need to shape the flour into a bowl shape.
2. Mix 3 eggs and 2 tablespoons of olive oil into the flour. You will need to mix it VERY well. Use your hands to mix it...your body heat will help the dough come together. You are going to need to put your whole body and a lot of force into making the dough.
3. Once the dough comes together, form it into a ball, coat it with some olive oil, wrap it in saran wrap, and set it aside for a little bit!
4. After 30 minutes, the dough will be ready!
5. From this point on, follow the suggested preparation directions of your pasta maker!
6. Set a large pot of water to boil. Once the water comes to a rapid boil, add your pasta. I was really thrown off the first time I made pasta because it actually starts to foam for a second when you put it in the water! This is normal...don't panic! The pasta will cook in literally just a minute or two. Serve homemade pasta immediately!
Subscribe to:
Posts (Atom)