As part of the Foodbuzz Tastemakers program I received a sample of Kikkoman's Kara-Age Soy-Ginger Seasoned Coating Mix. To learn more about this products, as well as other Kikkoman products, you can check out their website!
The coating and salad were a huge hit on our dinner table, and I cannot wait to try other recipes with this mix! Each package of Kara-Age comes with two pouches of seasoning, which makes it a great value, and two nights of dinner! The coating has just enough ginger in it to be present without being spicy or over taking the entire meal. I wanted to take this product and create a healthy Pan-Asian (if you will) dinner, and built a salad around that concept.
The directions on the package call for the chicken or fish to be added to a bag with the coating and shaken until well coated. Then fry the chicken or fish in shallow oil. I did not want to spend extra time at the gym, and opted to try baking the Kara-Age coated chicken! I was happy with the results of baking the chicken, but will definitely try frying next time to see how it comes out.
Kara-Age Salad
Yields 3 large servings
Ingredients
1 lb boneless, skinless chicken tenderloins
1 package Kikkoman Kara-Age Soy-Ginger Seasoned Coating Mix
1 cup water
1 bag (for shaking the chicken and seasoning)
1/2 cup Kikkoman Citrus Ponzu Sauce
1 tbsp honey 2 bags salad mix made with romaine lettuce, red cabbage, and carrots
2 cups shelled edamame
1 cup broccoli bean sprouts
1 cup sliced water chestnuts
1 cup sliced white mushrooms
To Prepare the Salad
1. Pre-heat your oven to 350 degrees.
2. Dip the chicken in the cup of water and then shake them in the mix until well coated.
3. Spread the chicken out on a baking sheet and bake for 10 minutes. Flip the chicken and bake for another 10 minutes.
4. While the chicken is cooking, whisk the ponzu sauce and honey together.
5. Pour the two bags of salad mix into a bowl and toss with the ponzu-honey dressing.
6. When the chicken has finished cooking, assemble individual salads using the lettuce, chicken, edamame, bean sprouts, water chestnuts, and mushrooms.
Showing posts with label Chicken. Show all posts
Wednesday, September 14, 2011
Kara-Age Salad
Labels:
Bean Sprouts,
Chicken,
Dressing,
Edamame,
Salad,
Water Chestnuts
Wednesday, August 24, 2011
Ranch BLT Grilled Pizza
I told you I am in love with grilled pizza!
I just cannot get enough of the crispy and slightly charred crust!
Ranch BLT Grilled Pizza
Yields 3 personal sized pizzas
Ingredients
Crust
This recipe is an adaptation of the Kitchen Aid Crispy Pizza Crust recipe. If you do not want to make your own crust, you could use a pre-made plain crust from your local grocery store, or you can buy pre-made pizza dough in a bag, which is usually found near the deli counter at the grocery store! Pillsbury also has great crusts which can be found near their biscuits and rolls in the refrigerated section of the grocery store!
1 cup water heated between 110 and 115 degrees Fahrenheit
2 1/4 tsp yeast
1/2 tsp salt
2 tsp olive oil
2 1/2 - 3 1/2 cups flour
Toppings
15 slices pre-cooked bacon, chopped
3 chicken cutlets
1 large tomato, chopped,
6 tbsp ranch dressing
2 cups chopped romaine
You will also need aluminum foil for the grill!
To Prepare the Crust
1. Heat the water between 110 and 115 degrees.
2. Pour the yeast and water in a bowl or mixer, and gently mix them together.
3. Add the salt and olive oil to the bowl and gently mix.
4. Add the flour, starting with 2 1/2 cups, and adding no more flour than 3 1/2 cups total. The dough should stick together in a ball and still be slightly sticky when there is just enough flour added!
5. Coat a bowl with olive oil and place the dough ball in the bowl, turning it until the entire dough ball is coated with a thin layer of oil.
6. Cover the bowl with saran wrap and place it in a warm place that is free of drafts.
7. Let the dough set for an hour, or until it has doubled in size.
To Prepare the Pizza
1. Prepare your grill by either turning it to a high setting, or getting the coals nice and hot.
2. While your grill is heating, cut three pieces of aluminum foil that are each approximately 1 foot long, and split your pizza dough into 3 equal parts, with each piece of dough going onto a piece of foil. To keep your pizza from sticking to the foil after cooking, sprinkle some corn meal on the foil!
3. Throw your chicken on the grill and cook it until it is almost cooked all of the way through. Keep in mind that it will be going back on the grill, and you will not want it to dry out! When it is done cooking, cut it into strips or cubes.
4. Spread the dough into a circle by pressing from the inside of the dough ball out with the palm of your hand.
5. When you are happy with the size and thickness of your crust, spread 2 tbsp of ranch on each crust and then pile on the toppings of your choosing - EXCEPT for the lettuce.
5. Turn down your grill to a low setting, or take the lid off for a few minutes.
6. Carry each of your pizzas to the grill by carrying it from opposite corners of the foil, and gently place it down on the grill.
7. Once all of your pizzas are on the grill, cover them and let them cook for approximately 10 minutes, or until the bottom of the crust is firm and brown, and the top is firm and cooked through. The foil will stick just a little bit, so be sure you get all of it off before enjoying your meal! A little corn meal on the bottom of the crust will greatly help prevent this!
8. When your pizza comes off the grill, top it with a handful of romaine!
Wednesday, August 17, 2011
Grilled Calzones
Cutting Board Wednesday is upon us yet again, and this week I am attacking re-thinking some favorite Italian style fare! My Italian genes run deep and I just can't let go of my favorite foods, so I have been trying to find new ways to cook and substitute ingredients in some of my favorite dishes to make them a little healthier. Thanks to the folks in the advertising department at Pizza Hut, I have been craving a P'Zone (aka calzone) like a drunken college kid at 2 am on a 3 day weekend bender. Thanks to the almighty grill and a filling change I was able to satiate my craving! I opted for a grilled crust, as opposed to deep fried, chose lean grilled chicken breast, cheddar, and broccoli for my fillings, and decided to nix the sauce. A light sauce, turkey pepperoni, and skim cheese would work too for the traditionalists out there! Get creative with your fillings and make it to suit your tastes - this recipe's fillings are just a suggestion, so have fun with it! You can also bake your calzone if you are not the grilling type or the weather just does not want to permit it!
Grilled Calzones
Yields 3 large calzones
Ingredients
Crust
This recipe is the Kitchen Aid Crispy Pizza Crust recipe. If you do not want to make your own crust, you could use a pre-made plain crust from your local grocery store, or you can buy pre-made pizza dough in a bag, which is usually found near the deli counter at the grocery store! Pillsbury also has great crusts which can be found near their biscuits and rolls in the refrigerated section of the grocery store! If you decide to use a crust such as Pillsbury, you will need 1 crust for each calzone you intend to make.
1 cup water heated between 110 and 115 degrees Fahrenheit
2 1/4 tsp yeast
1/2 tsp salt
2 tsp olive oil
2 1/2 - 3 1/2 cups flour
Toppings
3 boneless, skinless chicken breasts
2 cups shredded cheddar
1 broccoli crown, cleaned and chopped (or 1 small bag of frozen broccoli, thawed)
You will also need aluminum foil for the grill!
To Prepare the Crust
1. Heat the water between 110 and 115 degrees.
2. Pour the yeast and water in a bowl or mixer, and gently mix them together.
3. Add the salt and olive oil to the bowl and gently mix.
4. Add the flour, starting with 2 1/2 cups, and adding no more flour than 3 1/2 cups total. The dough should stick together in a ball and still be slightly sticky when there is just enough flour added!
5. Coat a bowl with olive oil and place the dough ball in the bowl, turning it until the entire dough ball is coated with a thin layer of oil.
6. Cover the bowl with saran wrap and place it in a warm place that is free of drafts.
7. Let the dough set for an hour, or until it has doubled in size.
To Prepare the Calzone
1. Prepare your grill by either turning it to a high setting, or getting the coals nice and hot. If you plan on baking your calzone, pre-heat your oven to 350 degrees.
2. While your grill is heating, cut three pieces of aluminum foil that are each approximately 1 foot long, and split your dough into 3 equal parts, with each piece of dough going onto a piece of foil. To keep your calzone from sticking to the foil after cooking, sprinkle some corn meal on the foil! If you are baking your calzones, you can use a baking sheet with some parchment paper.
3. Throw your chicken on the grill and cook it until it is almost cooked all of the way through. Keep in mind that it will be going back on the grill or in the oven, and you will not want it to dry out! When it is done cooking, cut it into strips or cubes.
4. Spread the dough into a circle by pressing from the inside of the dough ball out with the palm of your hand.
5. When you are happy with the size and thickness of your crust, fill one half of the circle with fillings, and then gently pull the empty half of the circle over the toppings and press the edge of the calzone shut.
5. Turn down your grill to a low setting, or take the lid off for a few minutes.
6. Carry each of your calzones to the grill by carrying it from opposite corners of the foil, and gently place it down on the grill.
7. Once all of your calzones are on the grill, cover them and let them cook for approximately 10 minutes, or until the bottom of the crust is firm and brown, and the top is firm and cooked through. The foil will stick just a little bit, so be sure you get all of it off before enjoying your meal! A little corn meal on the bottom of the crust will greatly help prevent this! If you are baking them, cook them until the dough is firm and begins to turn golden brown.
Tuesday, August 9, 2011
Cap'n Crunch Chicken - Revisited
This week on the cutting board, I am revisiting Cap'n Crunch Chicken. This dinner is a very popular request at our house, but can be a little costly and results in my spending a lot of time at the gym! I decided to make it again this week - sans the vat of boiling Crisco. This saved my about $8.00 and god only knows how many calories, but was definitely not cut short on flavor! With this recipe I have also eliminated the egg wash for dredging, as it cuts some calories and prevents the Cap'n Crunch crust from turning mushy (which I learned the hard way a few weeks ago)! I usually serve the chicken along side corn on the cob and fresh fruit, which doesn't sound too horrible until I realized that it was a triple carb threat (not to mention deep fried). This time I opted for a tossed salad!
Cap'n Crunch Chicken
Yields approximately 4 servings
Ingredients
2 cups of Cap'n Crunch crumbs
1 1/2 lbs of boneless, skinless chicken tenderloins
To Prepare the Chicken
1. Pre-heat your oven to 350 degrees.
2. Run your Cap'n Crunch through a food processor, blender, or roll it with a rolling pin to make the crumbs.
3. Individually press each piece of chicken into the crumbs on each side twice until there is an even coating.
4. Place them on a baking sheet, and bake for approximately 20 minutes, flipping once half way through.
5. Serve with a salad and side of lite honey mustard dressing for dipping. I also like to sprinkle a few pieces of Cap'n Crunch on the salad in place of croutons!
Sunday, January 9, 2011
Chicken Marsala with Pappardelle
I'm baaaaaaack! After a weekend filled with driving, friends, and food, I quickly found myself back in the kitchen. It really has become my little nook in the house, except of course, when it is time to do the dishes! I had intended to make a warm and simple dinner tonight, and was happy with the outcome.
Earlier this week the squeals of joy could be heard throughout the neighborhood when my Rachel Ray subscription finally started and arrived in the mailbox! I will admit that I am not a huge fan of Rach's shows, but I used to LOVE watching $40 a day when I was in college, and I love her magazine. It is a fairly good mix of home, cooking, and travel.
I found myself drooling and staring at the picture of her meat-free Mushroom-and-Marsala Pappardelle recipe. Kudos to the food porn staff at her magazine, they won me over! As I have mentioned over and over again, my sister refuses to eat mushrooms...ugh...problem. I decided to twist the recipe around a little bit and accommodate her taste buds with chicken. I think if I had served two vegetarian meals in a row, since tomorrow is Meatless Monday, my dad would be cringing in fear of another vegetarian week on the blog!
So, with all of that being said, I have typed up Rachel's recipe below and added my notes in italics! It was really delicious, filling, and there was plenty to go around...twice! Be sure to read the recipe all the way through before cooking so you don't encounter any surprises along the way!
Mushroom and Marsala Pappardelle
Source: Every Day with Rachel Ray - February 2011
Yields 6 generous servings
Ingredients
2 cups chicken or vegetable stock
A handful of dried mushrooms, such as procini
Salt and Pepper
1 pound of pappardelle or other wide, long-cut pasta
4 tablespoons butter
3/4 pound cremini or portobello mushrooms, thinly sliced
1 large fresh bay leaf
1 small bunch tuscan kale or swiss chard, stemmed and very thinly sliced
4 shallots, chopped
2 cloves garlic, finely chopped
Freshly grated nutmeg. to taste
About 3/4 cup marsala wine
1 cup heavy cream
Afew sprigs fresh sage, very thinly sliced
Grated parmigiano-reggiano cheese
Right off the bat I can tell you that I eliminated all of the mushrooms from above, as well as the parmigiano-reggiano and sage. I also replaced the marsala with red cooking wine that I already had in the house! You will also need approximately 1 pound of thinly sliced skinless, boneless chicken and a teaspoon of either flour or cornstarch.
To Prepare
Place the stock and dried mushrooms in a saucepan and bring to a low boil. Lower the heat and reconstitute. Remove the mushrooms with a slotted spoon and chop.
Since I was not using mushrooms, I completely skipped this step. Instead, I started heating the butter in a frying pan with the sliced chicken and bay leaf.
Bring a large pot of water to a boil, salt it, add the pasta and cook until al dente. Drain, reserving a little of the pasta cooking water.
I could not find pappardelle at my grocery store, so I replaced it with paccheri. Paccheri is essentially HUGE, ridge free, ziti!
While the pasta is working, heat the butter in a large skillet over medium heat. Add the cremini (or portobello) mushrooms and bay leaf and increase the heat to medium-high. Cook, stirring occasionally, until the mushrooms darken, 7 to 8 minutes.
Again, I used this step to prepare the chicken. Of course, the cooking time was a little longer since I was working with raw chicken! Be sure to cook the chicken until it has turned white and its juices run clear.
Add the kale (or swiss chard), shallots, and garlic; season with salt, pepper, and nutmeg.
I used swiss chard and cut it down into strips that were approximately a 1/2 inch wide. The size worked nicely for the dish - the chard was present without being lost or overwhelming! Rachel's recipe also calls for freshly grated nutmeg, which is great, but I used pre-ground from my spice rack!
Cooking for about 7 minutes longer, then stir in the wine. Add the chopped reconstituted mushrooms and all but 1/4 cup of the mushroom infused stock (the grit settles to the bottom of the pan as the mushrooms reconstitute).
I added 1 3/4 cup of vegetable stock (approximately 1 can).
Stir in the cream and cook to reduce and thicken. Toss the pasta with the sauce, adding the reserved pasta cooking water if the sauce is too thick to coat the pasta nicely. Garnish with the sage and serve with the cheese.
I had a little problem with the sauce thickening. Despite following her fluid amounts in the recipe, it would not thicken! I cooked it for a while and had no results, so I added it to the pasta pan and turned on medium heat in the hopes that some of the sauce would be absorbed by the pasta and would help it thicken. I ended up pulling a little of the sauce out of the pan and mixing it with a teaspoon of cornstarch, made a paste, and added it back to the pan. The sauce thickened within a minute of me adding the cornstarch and sauce paste! If you don't have cornstarch, flour will have the same effect! Also, to help my novice chefs along, 1 cup of heavy cream is the 1/2 pint sized container at the grocery store!
Labels:
Chicken,
Cream,
Garlic,
Marsala,
Mushrooms,
Pappardelle,
Pasta,
Shallot,
Swiss Chard
Thursday, January 6, 2011
Pizza Pizza!
Last night was homemade pizza night! My Grandma Nancy has been making pizza at her house for at least 15 years. Whenever we would make the ride out to Pennsylvania we would beg for her to make "Grandma Pizza"...it would only be a 5 hour drive to pick up our pizza order hehe! She loads a fluffy crust with, in this order: sauce, parmesan, pepperoni, sausage, olives, and two kinds of shredded cheese. It bakes and bakes and bakes, and when it finally comes out of the oven is bubbling, golden brown, and smells something beyond delicious!
When I asked my brother what he wanted for dinner this week, since he goes back to dining hall food this weekend, he said, "Grandma Pizza!" I wanted to go Grandma's route, but couldn't afford the list of ingredients with the food budget, so I decided to go with a Barbecue Chicken Pizza and a Rustic Vegetable Pizza.
I made a crust from scratch with a recipe from my Kitchen Aid book, which I am now referring to as the Holy Grail. I doubled this recipe to make 2 pizzas!
Crusty Pizza Dough
Yields dough for 1 large pizza
Source: Recipes For Your Kitchen Aid Stand Mixer
Ingredients
1 package active dry yeast (2 1/4 teaspoons)
1 cup warm water (105 degrees to 115 degrees)
1/2 teaspoon salt
2 teaspoons olive oil
2 1/2 to 3 1/2 cups all-purpose flour
1 tablespoon cornmeal
Dissolve yeast in warm water in warmed mixer bowl. Add salt, olive oil, and 2 1/2 cups flour. Attach bowl and dough hook to mixer. Turn to Speed 2 and mix about 1 minute.
Continuing on Speed 2, add remaining flour 1/2 cup at a time, and mix until dough clings to hook and cleans sides of bowl, about 2 minutes. Knead on Speed 2 about 2 minutes longer.
Place dough in greased bowl, turning to grease top. Cover. Let rise in warm place, free from draft, about 1 hour, or until doubled in bulk. Punch dough down.
Brush 14-inch pizza pan with oil. Sprinkle with cornmeal. Press dough across bottom of pan, forming a collar around edge to hold toppings. Add toppings as desired. Bake at 450 degrees for 15 to 20 minutes.
I stuck fairly close to the recipe since I am still pretty new to the world of raised doughs, but I did make a few small changes because of what was available to me in my kitchen pantry. I was out of olive oil, so I replaced it with white truffle oil, which just added to the flavor of the crust. It did not changed the dough physically. The only other change I made was the pan I used. A pizza pan is not something I have added to my cooking arsenal yet, so I split the dough in two balls (remember...I made a double batch!) and spread it across to large baking sheets!
And for the toppings...
On the chicken pizza, I poured a 18 ounce jar of BBQ sauce, 1 pound of chopped pan-seared chicken, and 2 cups of shredded white cheddar.
On the veggie pizza, I placed a handful of spinach leaves, sundried tomatoes, sliced black olives, shitake mushrooms, and a heavy sprinkling of parmesan cheese.
The results are in...
The Barbecue Chicken Pizza was a HUGE hit! The Veggie Pizza, on the other hand, was good but missing something...I think it is called moisture! Oops! I really should have put some red sauce down on it, or opted for a shredded cheese that would have added some moisture while it cooked. You cook, you learn...I'll have better luck next time hehe!
Tuesday, November 9, 2010
Oven Roasted Chicken with Aromatic Vegetables
With Thanksgiving just about 2 short weeks away, my taste buds are growing impatient for all of those delicious smells and tastes of the day. With that being said, I could not resist the 59 cents per pound oven roasters at the grocery store this past weekend! I didn't want to go the whole route of stuffing though, and decided to go with aromatic veggies, especially after I saw the gorgeous carrots at the store (you'll see why in the picture below). Oven roasters are a great way to practice for Thanksgiving. Whether it is the first Thanksgiving you are cooking and are afraid of making mistakes or are nervous about the turkey process, or if you want to try some new flavors by the way of sauces, marinades, and toppings before the big day, an oven roaster makes perfect practice!
To Prepare the Vegetables
1. First be sure to clean and peel the carrots, peel the onion, and clean the celery stalks.
2. Cut a large onion into wedges. A large onion should make approximately 10 wedges.
3. Place the onions in the bottom of a very deep roasting pan (you will need aluminum foil later), or a cast iron casserole with a lid (approximately 7 quart capacity).
4. Cut approximately 2 pounds of carrots down into 1 1/2 inch to 2 inch lengths and scatter them evenly on top of the onions.
5. Cut approximately 1 pound of celery on a slight angle in 1 inch to 1 1/2 inch lengths and scatter them across the top of the onions and carrots.
To Prepare the Chicken
1. Be sure to have a sink that is clear of all dishes and that has been washed with mild soap and was thoroughly rinsed!
2. Place the ENTIRE package of chicken in the sink, and then cut it out of its wrappings. This will help keep your kitchen from being thoroughly contaminated with raw chicken juices! I will also recommend bringing your trashcan over to the sink and lifting the wrappers right out of the sink and putting them in the trash bag!
3. Check both the neck and tush areas for any baggies of giblets. Most people think that they are only packed with turkeys, but this is not always true, and you do not want the surprise of the baggie meeting you as you cut your dinner! At this point, if you do have a baggie of giblets, you can toss them if you prefer to, or you can keep them to cook up gravy, treat your pets, etc.
4. Wash the chicken clean with water both inside and out!
5. Let the chicken settle for a few minutes in the sink so the excess water can drain off, and then place it on top of the vegetables.
6. Rub the exposed areas of chicken with some olive oil (or if you prefer, butter). This will give the skin that oh so appealing crispy brown color that is so hard to resist!
7. Sprinkle the top of the chicken with a little coarse sea salt and black pepper.
8. If the baking pan you are using has a lid, put it on, or if you are using something that does not have a lid, make a foil tent over the entire pan!
9. Bake everything until the button pops, being sure to baste along the way if you pan is not self basting(see below)! It took about 2 1/2 hours for mine to cook all of the way, but keep in mind that it was not stuffed! You may need a little longer if you decide to stuff yours!
A Few Tips/Suggestions/Fun Facts
1. I'd like to take a minute to talk about self-basting casserole pans! I splurged last year on a Martha Stewart Enamel Cast Iron Oval Casserole during last year's after Christmas sales (You can thank me for the shameless plug later, Martha hehe). Only after getting home and opening the box to inspect my new toy, did I notice the nodules, or as I like to call them, cooking stalactites! These nodules actually collect moisture from the lid as your meal cooks and drips it down back onto the food slowly. What does this mean, you may ask? To me it means not trying to remove a pan from the oven or have it teeter on the edge of the rack, open it while wearing an oven mitt, trying to maneuver a baster in the oven while trying not to burn your wrists and forearms, no more cursing with half your body in the oven, etc!
2. If you don't want to layer the veggies, or don't have the space in your baking dish for that kind of height, you can stuff the chicken with them! You get the same delicious flavors with both the chicken and vegetables!
3. In place of using Butter/olive oil and salt and pepper, you could use a seasoned or herbal butter to add some real big flavor punches to the finished dish! You can also sprinkle some poultry seasoning on top of the butter/olive oil. Some other great options are: put sprigs of fresh herbs between the skin and meat for a delicious feast for your belly and your eyes, Inject the meat with juice or herb marinade, or top it with a chutney an hour before pulling it out of the oven. One of my favorite Thanksgiving chutneys is as simple as heating up some cranberry sauce with a splash of OJ!
4. Do you know that a group of chickens are called a Peep? I bet the name of that marshmallow Easter treat makes a whole lot more sense now!
5. If you are going for presentation, make sure the breast side of the chicken is facing up, but if you are looking for super moist meat, cook the chicken with the breast side down! I made this mistake once, and the meat was amazing. Let's just say that when I do this now a days, it is by choice, not ignorance hehe!
6. When I make a dinner this large, I like to use a crudites (vegetable) tray to store the left overs! It keeps everything nice and neat, and you don't have to dig in the fridge for 4 or 5 bowls!
To Prepare the Vegetables
1. First be sure to clean and peel the carrots, peel the onion, and clean the celery stalks.
2. Cut a large onion into wedges. A large onion should make approximately 10 wedges.
3. Place the onions in the bottom of a very deep roasting pan (you will need aluminum foil later), or a cast iron casserole with a lid (approximately 7 quart capacity).
4. Cut approximately 2 pounds of carrots down into 1 1/2 inch to 2 inch lengths and scatter them evenly on top of the onions.
| Found these beautiful bundles of carrots at the grocery store...just one of those simple little things that leaves me grinning the in kitchen for hours on end! |
To Prepare the Chicken
1. Be sure to have a sink that is clear of all dishes and that has been washed with mild soap and was thoroughly rinsed!
2. Place the ENTIRE package of chicken in the sink, and then cut it out of its wrappings. This will help keep your kitchen from being thoroughly contaminated with raw chicken juices! I will also recommend bringing your trashcan over to the sink and lifting the wrappers right out of the sink and putting them in the trash bag!
3. Check both the neck and tush areas for any baggies of giblets. Most people think that they are only packed with turkeys, but this is not always true, and you do not want the surprise of the baggie meeting you as you cut your dinner! At this point, if you do have a baggie of giblets, you can toss them if you prefer to, or you can keep them to cook up gravy, treat your pets, etc.
4. Wash the chicken clean with water both inside and out!
5. Let the chicken settle for a few minutes in the sink so the excess water can drain off, and then place it on top of the vegetables.
6. Rub the exposed areas of chicken with some olive oil (or if you prefer, butter). This will give the skin that oh so appealing crispy brown color that is so hard to resist!
7. Sprinkle the top of the chicken with a little coarse sea salt and black pepper.
8. If the baking pan you are using has a lid, put it on, or if you are using something that does not have a lid, make a foil tent over the entire pan!
9. Bake everything until the button pops, being sure to baste along the way if you pan is not self basting(see below)! It took about 2 1/2 hours for mine to cook all of the way, but keep in mind that it was not stuffed! You may need a little longer if you decide to stuff yours!
| So delicious!!! |
A Few Tips/Suggestions/Fun Facts
1. I'd like to take a minute to talk about self-basting casserole pans! I splurged last year on a Martha Stewart Enamel Cast Iron Oval Casserole during last year's after Christmas sales (You can thank me for the shameless plug later, Martha hehe). Only after getting home and opening the box to inspect my new toy, did I notice the nodules, or as I like to call them, cooking stalactites! These nodules actually collect moisture from the lid as your meal cooks and drips it down back onto the food slowly. What does this mean, you may ask? To me it means not trying to remove a pan from the oven or have it teeter on the edge of the rack, open it while wearing an oven mitt, trying to maneuver a baster in the oven while trying not to burn your wrists and forearms, no more cursing with half your body in the oven, etc!
| Some pretty sweet enamel-wear stalactites hehe! |
3. In place of using Butter/olive oil and salt and pepper, you could use a seasoned or herbal butter to add some real big flavor punches to the finished dish! You can also sprinkle some poultry seasoning on top of the butter/olive oil. Some other great options are: put sprigs of fresh herbs between the skin and meat for a delicious feast for your belly and your eyes, Inject the meat with juice or herb marinade, or top it with a chutney an hour before pulling it out of the oven. One of my favorite Thanksgiving chutneys is as simple as heating up some cranberry sauce with a splash of OJ!
4. Do you know that a group of chickens are called a Peep? I bet the name of that marshmallow Easter treat makes a whole lot more sense now!
5. If you are going for presentation, make sure the breast side of the chicken is facing up, but if you are looking for super moist meat, cook the chicken with the breast side down! I made this mistake once, and the meat was amazing. Let's just say that when I do this now a days, it is by choice, not ignorance hehe!
6. When I make a dinner this large, I like to use a crudites (vegetable) tray to store the left overs! It keeps everything nice and neat, and you don't have to dig in the fridge for 4 or 5 bowls!
| Working clockwise from 12 o'clock: Gravy, Fresh Cut Corn Kernels, Roasted Chicken, Aromatic Veggies, and Mashed Potatoes. |
Labels:
Aromatic,
Carrots,
Celery,
Chicken,
Meat,
Onions,
Roaster,
Thanksgiving,
Vegetables
Sunday, October 10, 2010
Creamy Chicken and Green Bean Casserole
It is the official start of my self proclaimed CASSEROLE WEEK!!! Why casseroles, you may ask? They are easy and cheap to make, are a great way to get left overs out of the fridge and freezer, and can be made a head of time and reheated! Plus, casseroles are great for lunch the next day or two! I know that some of you do not have ovens or access to them, so I would like to take a quick second here to tell you that you do not have to have an oven to enjoy a casserole! All of the ingredients can be prepared and heated and then served on top of each other. For example, with tonight's recipe, you can heat the green beans in the sauce while the chicken cooks, and then top with the stuffing mixture. Sometimes, we just have to get a little creative to enjoy our kitchen and dinner!
I have made this casserole for some of my friends in the past, but never for my family, so it is new for my dad and sister...hopefully they will be digging in for seconds!
Creamy Chicken and Green Bean Casserole
Yields 6 - 8 servings
To Prepare the Casserole
1. Pre-heat your oven to 350 degrees.
2. Heat a tablespoon or two of olive oil in a frying pan over medium heat.
3. Once the olive oil is hot, add 1 pound of chicken. I used boneless, skinless chicken tenderloins!
4. While the chicken is cooking, start making the sauce by adding 2 cans of cream of chicken soup, 2 cans of cream of mushroom soup, and 1 cup of white wine in a bowl and mixing it well. (Be sure to pour yourself a glass of wine while you are at it!)
5. Pour a thin layer of sauce in a large casserole dish.
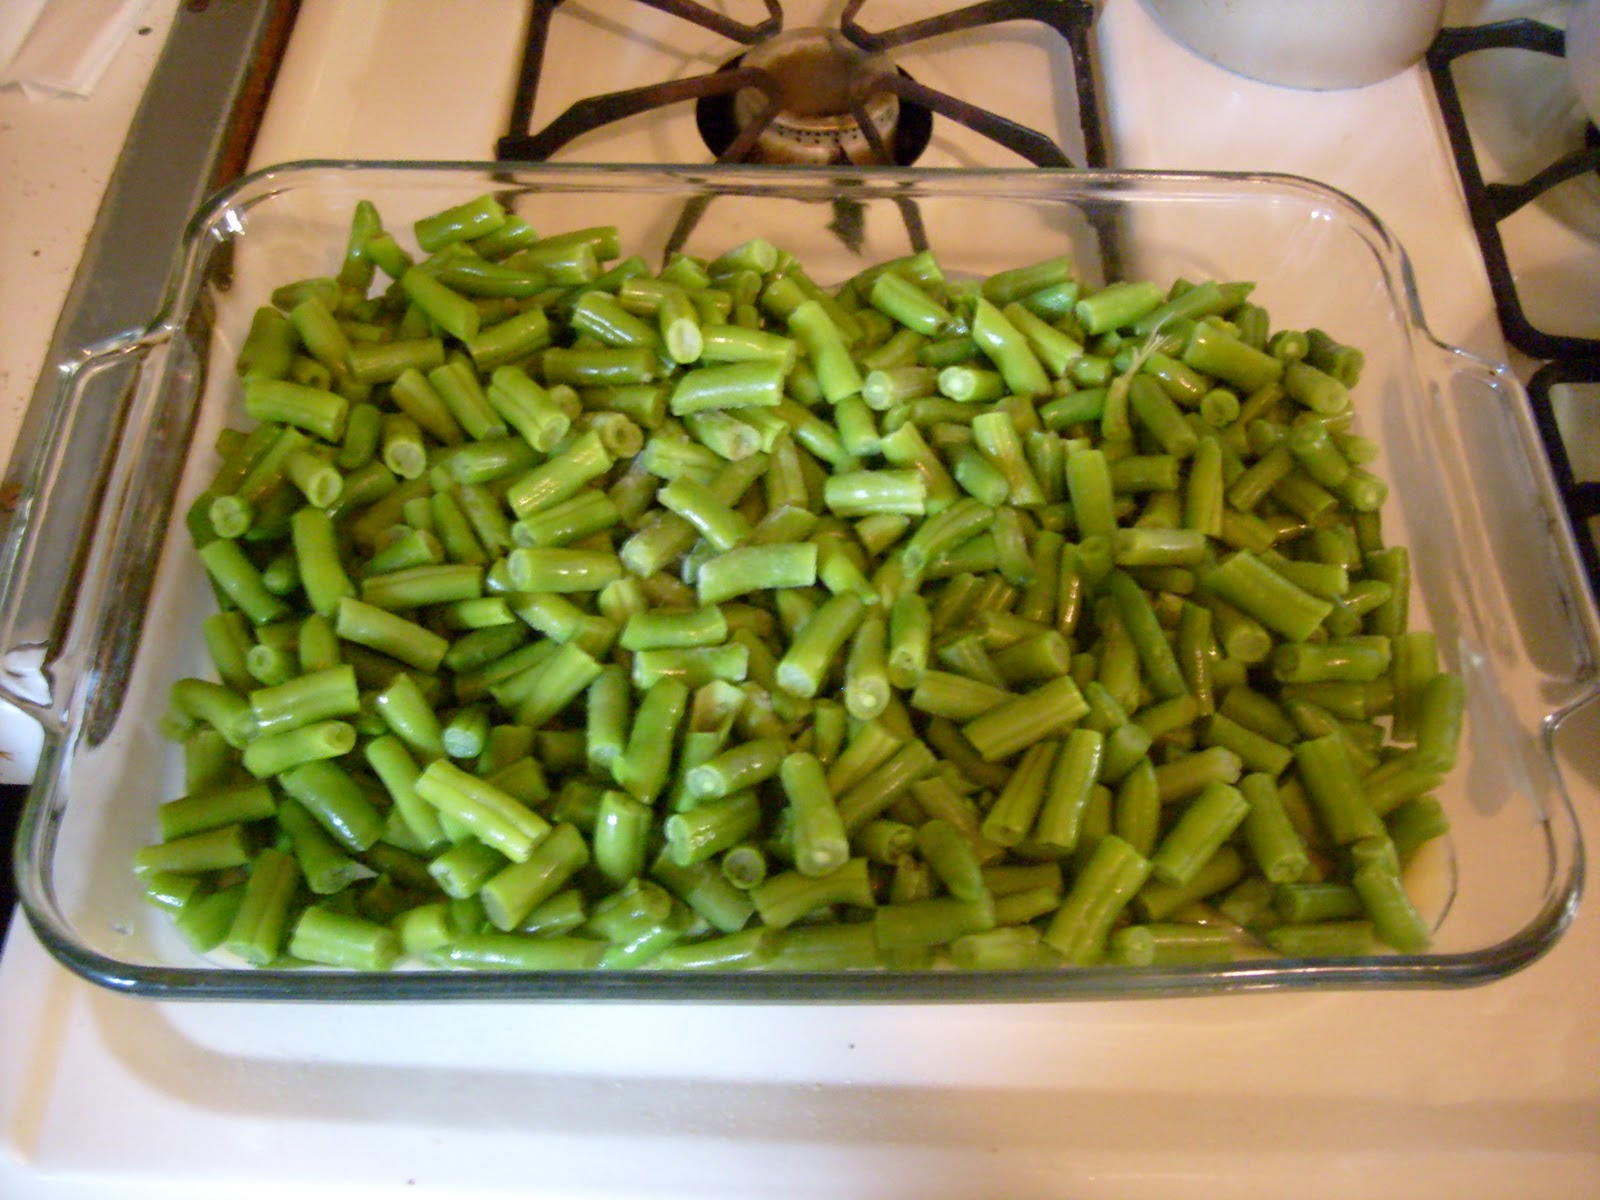
6. Put 2 pounds of thawed green beans in the casserole dish.
7. Evenly spread the cooked chicken on top of the green beans.
8. Cover the entire casserole with the remaining sauce.
9. Top with dry, seasoned stuffing cubes.
10. Bake in the oven for approximately 45 minutes, or until the stuffing is golden brown and the sauce is bubbling!
Enjoy your casserole with a glass of white wine!
Wednesday, September 29, 2010
Chicken Paprikash over Egg Dumplings
For the longest time (aka most of my life), I never got to experience the Hungarian cuisine of my dad's childhood! His father, a Hungarian to the core, loved the traditional dishes of the motherland, but unfortunately, with his untimely death in the early '80s, we lost most of the recipes. He notoriously did not write down recipes or share all of the ingredients or directions, so none of us never really knew how to make any of the traditional Hungarian dishes! For example, he used to make a Hungarian cookie called Kiffles. He gave my mom the recipe for the cookies, but did not tell her until he was on his death bed, that hers always fell apart because he didn't tell her to egg wash them before baking! My grandmother stopped making most of the Hungarian dishes after he passed away, much to my dismay! After about 22 years of searching and asking around, my aunt was able to provide me with a fairly authentic chicken paprikash recipe! Here is my adaptation of her recipe...
Chicken Paprikash over Egg Dumplings
Yields 3 - 4 servings
To Prepare the Chicken Paprikash
1. Heat 1/2 a stick (4 tablespoons or 1/4 cup) of butter in a large skillet over medium heat.
2. Once the butter has heated, add 1 pound of thin cut skinless, boneless chicken breasts.
3. While the chicken is browning in the butter, cut 2 small onions in half moons.
4. Flip the chicken once it has browned on the first side, and add the onions.
5. While the onions brown with the other side of the chicken, cut 2 green bell peppers into 1/4 wide strips.
6. Add the peppers to the pan and stir everything together well!
7. Cook everything over medium heat until the peppers soften a little bit.
8. Add a 14 ounce can of either chicken or vegetable broth to the pan.
9. Add 2 heaping teaspoons of paprika to the pan.
10. While everything is coming to a boil, mix 1 tablespoon of flour with 1/4 cup of water, and add it to the boiling pan. This will help thicken the sauce!
11. Stir 1 cup of sour cream into the pan.
12. Once everything is blended well, add salt and pepper to taste. If your sauce is too spicy, add some more sour cream, milk, or cream...it will help soften the flavor!
13. Cover the pan and let everything simmer on low heat while you prepare the dumplings!
To Prepare the Dumplings
*If you don't want to make dumplings, this serves very well over egg noodles or rice!
1. Put a large pot of water on to boil.
2. Add 1 1/2 cups of flour to a bowl.
3. Add 3 eggs to the bowl.
4. Add 1/2 cup of milk to the bowl.
5. Mix everything together until it becomes a batter.
6. When the water has come to a rapid boil, use a small spoon and drop the batter into the water by the spoonful.
7. The dumplings are done cooking when they float. Remove them from the water by either pouring the water and dumplings through a sieve, or by scooping them out with a slotted spoon or mesh colander!
To Serve
1. Put a spoonful or two of dumplings on a plate and top it with some chicken, vegetables, and sauce!
Tuesday, September 28, 2010
Cinnamon Chicken with Vanilla Raisin Yogurt Sauce over Polenta
This is one of those amazing dishes you have at a restaurant, and then when you go back to have it again, the restaurant has changed owners, and it is mysteriously the ONLY dish that is no longer on the menu...but I'm not bitter about it (<-- that would be the sarcasm lol)! I had a very similar dish at a restaurant in the town I went to college in, and loved it! I have found nothing like it since, but have found a way to replicate it closely enough at home. I do cheat and use pre-made polenta, mainly because I do not have the tolerance to figure out the balance of liquid to cornmeal, or want to risk burning it in a pot...it can be an excruciating process! If you are looking for the pre-made stuff, it can be found either with refrigerated vegetarian products (such as veggie burger patties), or in the Italian aisle of your grocery store!
Cinnamon Chicken with Vanilla Raisin Yogurt Sauce over Polenta
Yields 3 servings
To Prepare the Chicken
1. Rub 1 pound of chicken with cinnamon. It takes approximately 1 tablespoon of cinnamon to coat all of the chicken! I like using thin sliced boneless, skinless chicken breast for this recipe!
2. Heat a frying pan coated with non-stick spray over medium heat.
3. Add your chicken to the pan once it is coated.
4. Flip the chicken once the underside has turned white and is starting to turn white up the sides.
To Prepare the Sauce
1. Mix 1 single serve sized container of vanilla yogurt (approximately 6 ounces) and a serving sized box of raisins together in a sauce pan.
2. Heat over very low heat, being sure to stir occasionally while preparing the rest of the meal!
To Prepare the Polenta
1. Heat some oil or non-stick spray in a frying pan.
2. While the pan and oil are heating, cut the polenta into 1/2 inch wide slices.
3. Add the polenta to the pan.
4. Flip it when the bottom begins to brown.
5. The polenta is done when the second side has also browned!
To Serve
1. Place the polenta on the plate and top with the chicken.
2. Drizzle some of the yogurt and raisin sauce on top of the chicken.
Monday, September 20, 2010
Tropical Chicken over Brown Rice
There is a school of thought (and some research to support it) that says we should eat by color. The theory behind this is that the more colorful our plates are, the more vitamins and minerals we are getting. Part of the reason I love making this dish is because of how colorful it is! It is also full of lots of vitamins and minerals, and is a great meal if you are not a fan of vegetables, but want the benefits of eating them! This recipe cooks up really fast (about 15 minutes), and is great if you are on the run! If you are more interested in the whole eating by color movement, I have attached a link. I have to admit that I, personally, think it makes sense, and makes for some interesting reading! It may even encourage you to pile up some extra greens, reds, yellows, oranges, and purples on your plate! Eating By Color
Tropical Chicken over Brown Rice
Yields 6 servings
To Prepare the Chicken
1. Heat 2 tablespoons of olive oil in a large frying pan.
2. Cut 3/4 pound of boneless, skinless chicken breast tenderloins into 1 inch long pieces.
3. Add the chicken to the frying pan and cook over medium heat.
4. While the chicken is cooking, slice two green bell peppers into strips.
5. Add the bell pepper strips to the chicken.
6. Cook the chicken and peppers until the chicken is thoroughly cooked.
7. Add a jar of tropical fruit medley (drained of its juices) to the frying pan. I personally like to use Dole's Tropical Mix. It has a lot of great fruit in it (papaya, mango, pineapple, etc)! The jar is about 24 ounces of fruit!
8. Add approximately 10 ounces of sauce. Tonight I used an orange ginger sauce, other times I will use a sweet and sour sauce...it depends on what is on sale when I go down the Asian aisle at the grocery store! In general, anything orange or sweet and sour in flavor will work with this recipe!
9. While the chicken mixture is cooking for a little bit longer, make your rice.
| Served along side homemade pickled beets! |
Subscribe to:
Posts (Atom)